CVT Transmission Fluid Change: Intervals, Costs & Tips
📌 Quick Summary Regular CVT transmission fluid changes are the most effective way to prevent belt slippage and extend the life of…
Regular CVT transmission fluid changes are the most effective way to prevent belt slippage and extend the life of your vehicle. While some brands claim ‘lifetime’ fluid, experts recommend replacement every 30,000 to 60,000 miles to ensure smooth operation. Always use CVT-specific fluid, as traditional ATF can cause immediate and catastrophic internal damage.
🎯 Key Takeaways
- Change CVT fluid every 30,000–60,000 miles to maintain optimal belt friction.
- Never substitute CVT fluid with standard ATF to avoid internal component failure.
- Watch for shuddering, whining, or delayed engagement as signs of fluid breakdown.
- Replace the transmission filter during service to remove harmful metal contaminants.
- Verify fluid levels at specific operating temperatures for an accurate refill.
Most transmission maintenance”>Continuously Variable Transmissions (CVTs) require a fluid refresh every 30,000 to 60,000 miles to maintain the critical friction levels required by the internal belt and pulley system. While some manufacturers claim their fluid is “lifetime,” real-world driving conditions—especially stop-and-go traffic and extreme heat—degrade the fluid’s protective additives much faster than expected. Neglecting this service is the primary cause of CVT failure, often resulting in expensive replacements that could have been avoided with a simple fluid swap.

Proactively changing your fluid ensures the transmission remains responsive and prevents the “slipping” sensation common in older units. Because CVTs rely on high-pressure hydraulics and precise friction coefficients to move the steel belt, the quality of your fluid is the single most important factor in your vehicle’s longevity. This guide breaks down exactly when to service your unit and the specific technical steps required to do it correctly at home.
Recommended Service Intervals and Signs of Fluid Degradation
The standard recommendation for most modern CVTs is to change the fluid every 40,000 miles if you want the transmission to last beyond its warranty period. If you frequently tow, drive in mountainous terrain, or live in a desert climate, you should shorten this interval to 25,000 or 30,000 miles. Unlike traditional geared automatics, CVTs generate significant internal heat through friction, which oxidizes the fluid and reduces its ability to protect the metal surfaces.

Warning Signs That Your Fluid is Spent
You don’t always have to wait for a specific mileage marker to know it is time for a change. Your car will often tell you through subtle performance changes. Watch for these common symptoms of degraded fluid:
- Increased Noise: A high-pitched whining or humming sound that gets louder as you accelerate often indicates the fluid is too thin to lubricate the bearings properly.
- Sluggish Response: If there is a noticeable delay when you shift from Park to Drive or Reverse, the fluid’s viscosity has likely broken down.
- RPM Fluctuation: “Hunting” for the right ratio or seeing the tachometer needle bounce while cruising at a steady speed suggests the belt is struggling to grip the pulleys.
- Burning Smell: If you smell a sweet, acrid scent after a long drive, the fluid is overheating and has lost its chemical integrity.
The Ultimate CVT Transmission Fluid Change Walkthrough
Continuously Variable Transmissions (CVTs) are highly sensitive mechanical systems that rely on the hydraulic pressure and cooling properties of specialized fluid to operate correctly. Unlike traditional planetary gear transmissions, CVTs use a belt-and-pulley system that generates significant heat and friction, causing the fluid to break down over time. This guide covers the end-to-end process of replacing your CVT fluid, a critical maintenance task that can prevent “shuddering,” belt slippage, and catastrophic transmission failure. By following these precise steps, you ensure your vehicle maintains its fuel efficiency and smooth acceleration for years to come.
Step 1: Preparation and Safety Setup
What you need: Floor jack, two jack stands, wheel chocks, safety glasses, and a level working surface.
Instructions: Begin by parking your vehicle on a flat, level concrete surface. Engaging the parking brake is mandatory. Place wheel chocks behind the rear tires to prevent any movement. Use the floor jack to lift the front of the vehicle at the manufacturer-approved jacking points, then lower it onto jack stands. It is crucial that the car remains level; if the front is significantly higher than the rear, you may get an inaccurate reading when draining or refilling the fluid. Once the car is secure, give it a firm shake to ensure stability. Don your safety glasses and gloves, as CVT fluid is chemically aggressive and can cause skin irritation.
Pro Tip: Never rely on a hydraulic jack alone when working under a vehicle. Always use rated jack stands to prevent a fatal accident if the jack’s seals fail.
Step 2: Fluid Identification and Procurement
What you need: Owner’s manual, VIN number, and the specific CVT fluid recommended by the manufacturer.
Instructions: CVTs are notoriously picky about fluid chemistry. You must use the exact specification required for your make and model, such as Nissan NS-3, Honda HCF-2, or Toyota FE. Mixing generic ATF or the wrong version of CVT fluid can lead to immediate transmission damage. Check your owner’s manual or call a dealership with your VIN to confirm the required volume and type. Generally, a simple drain and fill requires 4 to 6 quarts, but you should purchase an extra quart just in case. Ensure you also have a new crush washer for the drain plug and, if your vehicle uses one, a replacement pan gasket and internal filter.
Pro Tip: Avoid “Universal” CVT fluids unless they specifically list your vehicle’s fluid specification on the back of the bottle. When in doubt, stick with the OEM (Original Equipment Manufacturer) fluid.
Step 3: Accessing the Transmission Pan
What you need: Socket set (usually 10mm or 12mm), flathead screwdriver, and a trim removal tool.
Instructions: Most modern vehicles feature a plastic aerodynamic splash shield under the engine bay that protects components from road debris. Locate the plastic clips and metal bolts securing this shield. Use your trim tool to gently pop the center pins of the plastic clips to avoid breaking them, as they become brittle over time. Once the clips and bolts are removed, slide the shield out of the way to reveal the transmission oil pan. Take a moment to inspect the area for any existing leaks or signs of damage. If the pan is covered in heavy grime, use a can of brake cleaner to wipe it down so you can clearly see the drain plug and pan bolts.
Pro Tip: Keep a small magnetic tray nearby to organize the various clips and bolts you remove; losing a specialized plastic clip can lead to a rattling splash guard later.
Step 4: Draining the Old CVT Fluid
What you need: Graduated drain pan (one with volume markings), socket wrench, and a new crush washer.
Instructions: Position your drain pan directly under the transmission drain plug. Slowly loosen the plug using the correct socket. As the plug reaches its final threads, pull it away quickly to minimize splashing. The fluid will likely be a dark green or amber color; if it smells burnt or looks like chocolate milk, you may have internal damage or coolant contamination. The most critical part of this step is measuring exactly how much fluid comes out. Because CVTs are sensitive to “overfilling” or “underfilling,” knowing the exact volume drained provides a baseline for the refill. Wait at least 15 minutes for the dripping to stop completely before proceeding.
Pro Tip: If your drain pan isn’t graduated, pour the old fluid into empty one-quart containers to get an accurate measurement of the volume removed.
Step 5: Cleaning the Magnets and Replacing the Filter
What you need: Torque wrench, replacement filter (if applicable), and lint-free shop towels.
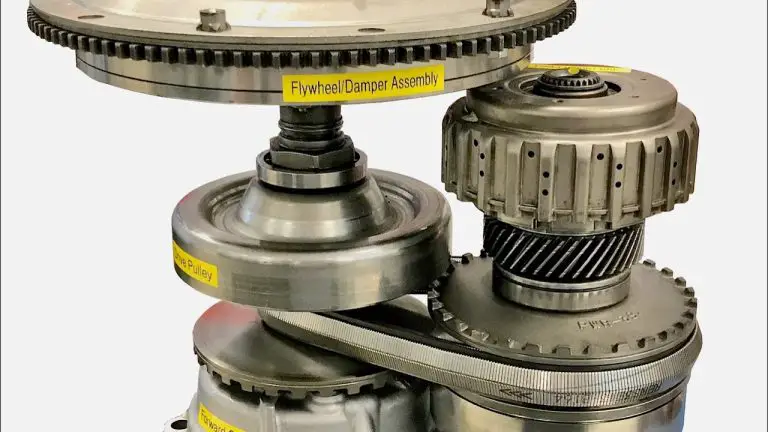
Instructions: Many CVTs have an internal filter and magnets located inside the pan. If you are performing a comprehensive service, remove the bolts holding the pan in place. Carefully lower the pan, being mindful of the residual fluid. You will see several round magnets stuck to the bottom of the pan; these catch fine metallic shavings. Pull them off and wipe them clean with a lint-free towel until they are shiny. If there are large chunks of metal, this indicates a failing belt or pulley. Remove the old filter, install the new one, and clean the mating surface of the transmission housing. Reattach the magnets to their designated spots in the clean pan and prepare the new gasket.
Pro Tip: When cleaning the pan, never use a fuzzy rag. Even a tiny piece of lint can clog the microscopic passages in the transmission’s valve body.
Step 6: Reinstalling the Pan and Drain Plug
What you need: Torque wrench and the manufacturer’s torque specifications (usually in lb-ft or Nm).
Instructions: Place the pan back onto the transmission housing, ensuring the gasket is perfectly aligned. Hand-tighten all the bolts first to ensure they aren’t cross-threaded. Using your torque wrench, tighten the bolts in a “star” or “criss-cross” pattern to ensure even pressure across the gasket; this prevents future leaks. Most pan bolts require very low torque (around 7-10 lb-ft). Finally, install the drain plug with a brand-new crush washer. Tighten the drain plug to its specific torque setting (usually around 25-35 lb-ft). Using an old crush washer is a common mistake that leads to slow, persistent drips that can eventually starve the transmission of fluid.
Pro Tip: Always use a torque wrench. Over-tightening pan bolts can easily strip the aluminum threads in the transmission case, leading to a very expensive repair.
Step 7: Refilling the Transmission
What you need: Long-neck funnel or a fluid transfer pump and the fresh CVT fluid.
Instructions: Locate the fill point. On some cars, this is a dipstick tube under the hood; on others, it is a “fill plug” located on the side of the transmission case. If using a fill plug, you will need a fluid transfer pump to move the fluid from the bottle into the transmission. Slowly pour in the exact amount of fluid you measured during the drainage process. For example, if 4.2 quarts came out, put 4.2 quarts back in. CVTs do not have much “headroom” for error; too much fluid causes aeration (bubbles), while too little causes overheating. Once filled, replace the dipstick or fill plug securely to prevent contaminants from entering the system.
Pro Tip: If your vehicle doesn’t have a dipstick, it is likely a “sealed” unit. In this case, the side fill plug acts as the level indicator—fluid should be level with the bottom of the hole.
Step 8: Level Verification and Warm-up Cycle
What you need: OBD-II scanner (optional, for temp monitoring) and a clean workspace.
Instructions: With the vehicle still on jack stands or back on level ground, start the engine. While keeping your foot firmly on the brake, slowly cycle the gear selector through every position (P, R, N, D, L) staying in each gear for about 10 seconds. This allows the new fluid to circulate through the valve body and torque converter. Let the engine run until the transmission reaches operating temperature (usually 95°F to 115°F). Check the fluid level again using the dipstick or the overflow plug. If the level is low, add small increments (1/8th of a quart) until it reaches the “Hot” mark. Finally, shut off the engine, inspect the pan for any leaks, and reinstall the splash shield.
Pro Tip: CVT fluid expands significantly when heated. Always perform your final level check while the fluid is at the temperature specified in the service manual to avoid inaccurate readings.
✅ Final Checklist
- Confirm the drain plug and all pan bolts are torqued to manufacturer specifications.
- Verify that the fluid level is between the “Min” and “Max” marks at operating temperature.
- Check the garage floor for any signs of fresh red, green, or amber leaks after the test drive.
- Ensure the splash shield is securely fastened with all clips and bolts accounted for.
- Reset the “Fluid Deterioration Counter” using an OBD-II scan tool if required by your vehicle (common on Nissans).
Important Notes:
- Safety Warning: Transmission fluid can be extremely hot after a drive; always allow the car to cool for at least an hour before draining.
- When to call a pro: If you find large metal shards in the pan or if the transmission is already slipping, a fluid change will likely not fix the underlying mechanical failure.
- Estimated Time: 1.5 to 3 hours.
- Estimated Cost: $80 – $150 for DIY (Fluid and filters) vs. $250 – $500 at a dealership.
Why CVT Fluid Differs from Traditional Automatic Transmission Fluid
It is a common mistake to assume that all transmission fluids are interchangeable, but putting standard Automatic Transmission Fluid (ATF) into a CVT is a recipe for instant mechanical failure. Traditional ATF is designed to be highly slippery to allow clutches to engage smoothly. In contrast, CVT fluid is a highly specialized “traction fluid.” It provides the specific amount of friction necessary to prevent the heavy steel belt from slipping against the smooth metal pulleys under high torque.

The Importance of Manufacturer-Specific Specs
CVT fluids are not “one size fits all.” Each manufacturer uses a unique chemical blend tailored to the pressure settings and materials used in their specific transmission. Using the wrong spec can lead to seal swelling or belt slippage.
- Nissan (NS-2/NS-3): These fluids are designed for the high heat profiles of JATCO transmissions. NS-3 is usually required for newer models and provides better oxidation resistance.
- Honda (HCF-2): Used in modern Earth Dreams CVTs, this fluid has a different viscosity than earlier Honda CVT fluids and is not backward compatible with older “CVT-1” systems.
- Subaru (Lineartronic): These fluids are formulated for the chain-driven systems used in Subarus and often have distinct color dyes (blue or orange) to prevent mixing.
Always verify the “Service Fill” capacity in your owner’s manual before starting. You typically won’t drain the entire system (which includes the torque converter and cooler lines), so you only need to replace the amount that actually drains out of the pan, which is usually between 4 and 6 quarts.
Step-by-Step CVT Fluid Change: Preparation and Draining
Before you begin, ensure the vehicle is level. A CVT is extremely sensitive to fluid levels; even being off by half a quart can cause aeration or foaming. You will need a metric socket set (usually 10mm and 19mm), a torque wrench, a large drain pan, and a funnel with a long, narrow neck that fits your transmission’s fill tube or dipstick hole.
Step 1: Lifting and Safety
Lift the vehicle using a floor jack and secure it on four jack stands. It is vital that the car is perfectly horizontal so the fluid drains completely and, more importantly, so the refill level is accurate later. If you only lift the front, you will get an incorrect reading when checking the final level.
Step 2: Draining the Old Fluid
Locate the transmission drain plug on the bottom of the transmission pan. Place your drain pan underneath and remove the plug. Pro Tip: Measure the exact amount of fluid that comes out. This gives you a baseline for how much fresh fluid to put back in. If 4.2 quarts come out, start by putting 4.0 quarts back in before doing your final level check. Inspect the drain plug magnet; a small amount of fine “metallic silt” is normal, but large chunks of metal indicate internal damage.
Step 3: Removing the Pan and Filter (If Applicable)
Many CVTs, particularly those from Nissan and Mitsubishi, have an internal “screen” filter and an external “cartridge” filter. To reach the internal screen, you must remove the bolts surrounding the transmission pan. Be careful, as the pan will still hold about half a quart of fluid even after draining. Once the pan is off, clean it thoroughly with brake cleaner and remove any debris from the internal magnets.
Cost Analysis: Professional Service vs. DIY Maintenance
The cost of a CVT fluid change can vary significantly depending on where you live and the specific requirements of your vehicle. Unlike traditional automatics, CVTs are often more sensitive to the type of fluid used, which can drive up the price of both the materials and the labor.
What to Expect at the Dealership or Independent Shop
If you choose to take your car to a professional, you can expect to pay anywhere from $200 to $600. Dealerships typically sit at the higher end of this range because they use proprietary OEM (Original Equipment Manufacturer) fluids, which are often non-negotiable for maintaining a factory warranty. Independent shops may offer more competitive rates, but it is vital to ensure they are using a high-quality fluid that meets your manufacturer’s exact specifications.
- Labor Costs: Usually account for 1 to 2 hours of work ($100–$300).
- Fluid Costs: Specialized CVT fluid can cost between $15 and $30 per quart; most vehicles require 5 to 8 quarts for a standard drain and fill.
- Disposal Fees: Most shops include a small fee for the ecological disposal of the old, degraded fluid.
The DIY Advantage and Hidden Expenses
Performing the service yourself can save you a substantial amount in labor, but the “hidden” costs of equipment can add up. To do the job right, you often need more than just a wrench. Many modern CVTs do not have a traditional dipstick, requiring a specialized fluid transfer pump and sometimes an OBD-II scan tool to monitor the transmission temperature for an accurate level check.
Pro Tip: If you go the DIY route, never settle for “universal” transmission fluids unless they explicitly list your vehicle’s fluid specification on the bottle. Using the wrong viscosity can lead to immediate belt slippage.
Common Risks of Neglecting CVT Fluid Replacement
Neglecting your CVT fluid is one of the most expensive mistakes a car owner can make. Because CVTs rely on friction between a metal belt and pulleys to transfer power, the fluid must maintain a very specific “grip.” As the fluid shears and oxidizes, that grip fails, leading to a cascade of mechanical issues.
Performance Degradation and Driveability Issues
The first signs of old fluid are usually felt rather than heard. You might notice a “rubber band” effect, where the engine revs high, but the car doesn’t seem to accelerate accordingly. This is often a sign that the fluid can no longer provide the necessary hydraulic pressure to move the pulleys efficiently.
- Transmission Slipping: You may feel a momentary loss of power or a jerking sensation during acceleration.
- Overheating: Degraded fluid loses its ability to dissipate heat, which can trigger “limp mode,” a safety feature that drastically limits your speed to protect the hardware.
- Whining Noises: A high-pitched whine often indicates that the fluid is foaming or that the internal filter is clogged with debris.
Long-Term Mechanical Failure
While a fluid change costs a few hundred dollars, a total CVT replacement can cost between $4,000 and $8,000. Because CVTs are complex and often considered “non-serviceable” by manufacturers, many shops will not repair them internally; they simply swap the entire unit. Regular fluid changes prevent the accumulation of metal shavings that act like sandpaper on the sensitive internal pulleys, effectively doubling or tripling the lifespan of the transmission.
Conclusion
Maintaining a CVT doesn’t have to be a source of anxiety. While these transmissions are more sensitive than their traditional counterparts, the “secret” to their longevity is remarkably simple: fresh fluid. By sticking to a strict 30,000 to 60,000-mile interval and using the correct specifications, you can avoid the dreaded performance lag and the astronomical costs of a total transmission failure.
If you aren’t sure when your fluid was last changed, your next step should be to check your owner’s manual or service records today. If you’re approaching the 60,000-mile mark, schedule an inspection with a trusted technician or start gathering your DIY supplies. Being proactive now is the best way to ensure your vehicle stays smooth, efficient, and on the road for years to come!
💬 Quick Questions & Answers
Can I use regular ATF in a CVT?
No, regular ATF lacks the specific friction modifiers required for CVT belts and will cause the transmission to fail.
How often should CVT fluid be changed?
Most mechanics recommend a change every 30,000 to 60,000 miles, regardless of ‘lifetime’ fluid claims.
What does degraded CVT fluid look like?
Fresh fluid is typically translucent or green/amber; degraded fluid looks dark brown, black, or opaque.
Is a CVT fluid change different from a flush?
A change involves draining and refilling, while a flush uses a machine to replace all fluid under pressure.
Does changing CVT fluid fix shuddering?
If the shuddering is caused by fluid breakdown or moisture, a change can often restore smooth performance.
❓ Frequently Asked Questions
Why do manufacturers claim CVT fluid is ‘lifetime’?
Manufacturers often define ‘lifetime’ as the duration of the powertrain warranty, but for long-term vehicle health, fluid must be replaced as it heat-cycles and loses its lubricating properties.
What are the most common symptoms of low CVT fluid?
Low fluid often manifests as a high-pitched whining noise, vehicle surging, or a noticeable delay when shifting from Park to Drive or Reverse.
Do I need to replace the filter during a CVT fluid change?
Yes, most CVTs have at least one filter or screen that captures metal shavings; replacing it is vital to prevent those particles from clogging the valve body.
How much does a professional CVT fluid change cost?
You can expect to pay between $200 and $450 at a dealership or specialized shop, depending on the fluid capacity and labor rates.
Is it possible to overfill a CVT transmission?
Yes, overfilling can cause the fluid to foam, leading to overheating and erratic shifting, which is why checking the level at the correct temperature is critical.
Does my car need a computer reset after a fluid change?
Some modern vehicles require a ‘deterioration cell’ reset via a scan tool so the car’s computer knows it is operating with fresh, high-viscosity fluid.