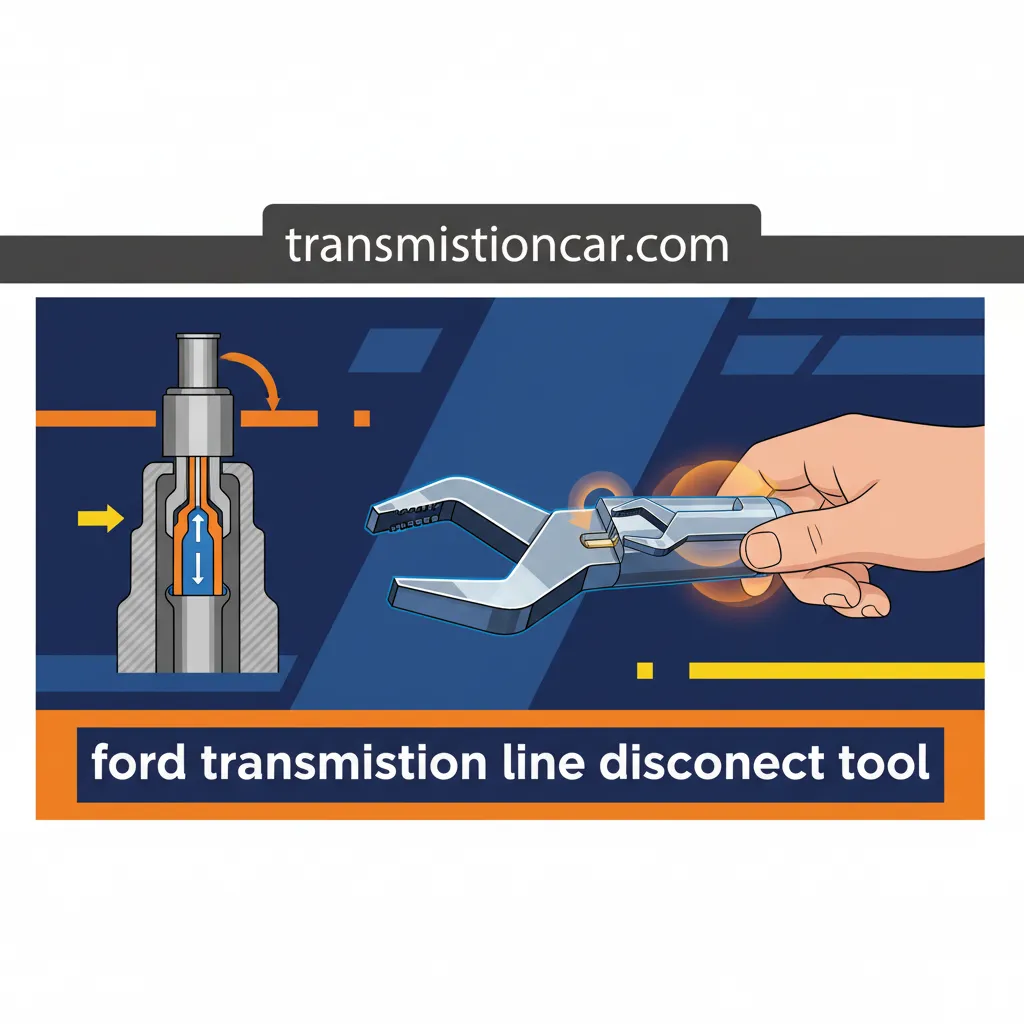
Ford Transmission Line Disconnect Tool: Technical Specifications And Usage Protocol
Maintaining the cooling system of a Ford vehicle requires more than just mechanical knowledge; it requires the precision of a dedicated Ford…
Maintaining the cooling system of a Ford vehicle requires more than just mechanical knowledge; it requires the precision of a dedicated Ford transmission line disconnect tool designed to navigate complex quick-connect fittings. Technicians and DIY enthusiasts often struggle with seized or inaccessible transmission cooler lines, leading to damaged fittings and costly fluid leaks when using improper equipment. This article provides an expert analysis of the Ford transmission line disconnect tool, detailing selection criteria, professional usage techniques, and troubleshooting steps to ensure a reliable repair.
Understanding the Engineering of Ford Quick-Connect Couplers
📤 Share Image
The architecture of Ford’s transmission cooling system has transitioned significantly over the last two decades. While older models utilized threaded inverted flare fittings that were prone to stripping and required flared wrenches, modern Ford vehicles utilize a “quick-connect” architecture. Specifically, Ford employs a garter spring mechanism within the female side of the fitting. This spring is a continuous circular coil that sits in a machined groove, designed to snap over a raised shoulder or “bead” on the male transmission line.
The Garter Spring Interface
When a line is inserted, the shoulder expands the garter spring until it passes through, at which point the spring contracts, locking the line in place. The disconnect tool’s primary function is to enter the mouth of the fitting and expand that spring uniformly. This allows the shoulder of the line to pass back through the spring without snagging or deforming the coil. On heavy-duty applications, such as the Super Duty platform, these fittings are scaled up to handle higher flow rates, yet the mechanical principle remains consistent.
Evolution of the Cooling System
The shift to modern transmissions like the 6R80 (found in 2009–2017 F-150s) and the 10R80 (found in 2018+ models) necessitated a move away from standard Jiffy-tite style connectors to these more robust spring-lock designs. For example, a 2015 Ford F-150 requiring a transmission cooler flush presents a unique challenge: the lines are often tucked behind the lower radiator support. Without the specific offset or “step” design of a Ford-specific tool, a standard universal tool may fail to fully seat against the garter spring, leading to frustration and potential component damage.
Standard SAE Sizes for Ford Lines
Standard Passenger/Light Duty
Heavy Duty / Super Duty
Severe Duty / Auxiliary Coolers

Selecting a Professional Grade Ford Transmission Line Disconnect Tool
In a professional shop environment, the choice of tool can be the difference between a 10-minute job and a 2-hour recovery from a broken fitting. While retail-grade plastic rings are common in “DIY” kits, they frequently fail under the high-torque demands of an older, road-grimed vehicle. I recommend anodized T6 aluminum tools for any technician looking for a reliable, long-term solution.
Material and Form Factor
Aluminum tools provide a rigid edge that does not deflect when pressure is applied. This rigidity ensures that the garter spring is compressed evenly across its entire 360-degree circumference. If one side of the spring remains uncompressed—a common issue with soft plastic tools—the line will not release, and further force will likely “round” or crush the spring, rendering the fitting useless.
Furthermore, the form factor is critical. In cramped engine bays like those found in the Ford Explorer or Taurus, low-profile scissor-style tools (like the Lisle 39660) are superior. These tools allow the technician to apply leverage from a distance, whereas standard plastic rings require fingers to be directly on the fitting, which is often physically impossible due to proximity to the frame rail or cooling fans.
Precision Machining
Aluminum tools maintain tighter tolerances, ensuring the “step” perfectly matches Ford’s internal spring depth.
Durability
Professional sets are 4x more durable than nylon equivalents, resisting chemical degradation from Mercon LV fluid.

Operational Protocol for Reliable Transmission Line Removal
Proper usage of a disconnect tool is as much about technique as it is about the hardware. Simply clamping the tool onto the line and pulling is a recipe for failure. A professional expert follows a specific sequence to ensure the internal integrity of the trusted Ford sealing system.
📋
Professional Removal Protocol
Before attempting removal, use compressed air and a fast-evaporating solvent to clear dirt and road grit from the mouth of the coupler. Any debris left inside can score the internal O-rings during extraction.
Push the transmission line into the fitting first. This centers the line and relieves the axial tension on the garter spring. While holding the line in, insert the tool and press it firmly into the fitting until you feel the spring expand.
Quickly extract the line and immediately cap both the line and the fitting. Modern transmissions utilize Mercon V or LV, and an uncontrolled disconnect can result in the loss of up to 1.5 quarts of fluid in under 30 seconds.
Transmission fluid in a Ford F-series after a drive can easily exceed 150-180°F. Never attempt to disconnect cooler lines on a vehicle at full operating temperature without appropriate PPE, as residual line pressure can spray hot synthetic fluid onto the technician.
Troubleshooting Seized and Contaminated Line Connections
In the “Rust Belt” or coastal regions, the primary obstacle to line removal is not the tool itself, but galvanic corrosion. Ford typically uses aluminum fittings paired with steel cooling lines. When these two dissimilar metals interact with road salt and moisture, they bond at the molecular level. This is particularly prevalent on high-mileage Super Duty trucks.
Advanced Extraction Techniques
If the line refuses to budge after using the push-pull technique, the internal garter spring is likely jammed with oxidized metal or road grit. At this stage, I recommend a targeted application of a high-quality penetrating catalyst. Avoid generic lubricants; use a professional-grade penetrant and allow it to dwell for at least 20 minutes. While the penetrant works, use a small pick to clear the gap between the line and the fitting mouth.
Identifying Fitting Failure
During the troubleshooting phase, it is vital to inspect the “bead” of the transmission line. If a previous repair was attempted with a poor-quality tool, the bead may be scored. A scored bead will “roll” the internal O-ring upon reassembly, leading to a slow, persistent leak that is difficult to diagnose once the system is pressurized. Approximately 25% of DIY attempts without a professional-grade tool result in damage to the internal spring cage or the sealing surface.
✅ Expert Fixes
- Use heat (moderately) to expand the aluminum housing if seized.
- Replace internal O-rings with Ford-spec Viton seals if removal was difficult.
- Verify line bead smoothness with 2000-grit sandpaper before re-insertion.
❌ Critical Errors
- Forcing the line with pliers, which distorts the roundness of the tubing.
- Re-using a garter spring that has been stretched or bent.
- Skipping the solvent cleaning step, leading to grit-contaminated fluid.
Post-Service Verification and System Reassembly
The job is not complete once the lines are disconnected; the reinstallation is arguably more critical for long-term reliable operation. The 10R80 transmission operates at internal line pressures that can exceed 250 PSI under load. If a line is not seated perfectly, it can blow off under pressure, leading to catastrophic transmission failure in seconds.
The “Click and Tug” Test
Upon re-inserting the line, you should hear and feel a distinct mechanical “click” as the garter spring snaps over the line shoulder. Once you hear this, perform a “tug test.” Pull outward on the line with significant force. If the connection is secure, there should be zero play. If the line moves outward, the spring has not fully engaged, and the line must be pushed in further.
Secondary Locking Clips
Most modern Ford transmission fittings utilize a secondary plastic safety clip that snaps over the fitting after the line is installed. These are not decorative; they serve as critical insurance against catastrophic line separation. Always replace these clips if they are brittle or show signs of stress whitening.
After completing the job, wipe your aluminum disconnect tools with a clean rag soaked in brake cleaner. Oil and grit left on the tool can act as an abrasive during the next use, potentially damaging the garter springs on your next service vehicle. A well-maintained tool set is a hallmark of an expert technician.
Finally, perform a thermal cycle test. Start the engine, bring the transmission to operating temperature (at least 175°F to ensure the thermostat has opened and fluid is flowing through the cooler), and inspect all connections for “seeping.” A drop of fluid every 30 seconds may seem minor, but at highway speeds, it will quickly lead to low fluid levels and burnt clutches.
Selecting the correct size and material for your Ford disconnect tool is the foundation of a successful repair. Utilizing the ‘push-pull’ technique ensures the internal garter spring is compressed without causing damage to the line. Always verify connections with a physical pull test and secondary clip installation to prevent high-pressure failures. Invest in a professional-grade aluminum disconnect set today to ensure your Ford’s transmission system remains leak-free and properly maintained for years to come.
Frequently Asked Questions
What size disconnect tool does a Ford F-150 require?
Most modern Ford F-150 trucks utilize 3/8-inch or 1/2-inch transmission cooler lines. It is highly recommended to use a multi-size professional set, as sizes can vary between the radiator inlet and the auxiliary cooler, especially in vehicles equipped with heavy-duty towing packages.
Can I use a plastic disconnect tool, or is metal necessary?
While plastic tools are affordable and sufficient for occasional DIY use, professional technicians prefer anodized aluminum. Metal tools offer more rigidity, which is essential when dealing with stubborn or debris-filled connectors where plastic might flex and fail to fully compress the internal spring.
How do I know if I have successfully disconnected the line?
Once the tool is fully inserted into the fitting, you should feel the internal spring expand over the tool’s flange. By pushing the line slightly into the fitting while inserting the tool, and then pulling the line out firmly, the connection should slide apart smoothly without significant resistance.
What should I do if the line is stuck even with the tool inserted?
If the line remains seized, debris is likely trapped in the spring cage. Use a trusted penetrating oil and compressed air to clean the fitting. Avoid prying with a screwdriver, as this can deform the line or the fitting, leading to a permanent leak that requires component replacement.
Is it necessary to replace the O-rings inside the fitting?
If the line has been disconnected after high mileage or if a leak was previously present, the internal O-rings should be inspected. For maximum reliability, many experts recommend replacing the quick-connect fitting entirely if the O-rings show any signs of flattening, cracking, or contamination.