How Much Transmission Fluid to Add? Top-Off & Capacity Guide
📌 Quick Summary Most routine top-offs require only 0.5 to 1 quart of fluid to move the level from the ‘Add’ line…
Most routine top-offs require only 0.5 to 1 quart of fluid to move the level from the ‘Add’ line to the ‘Full’ mark. For a standard pan-drop service, expect to use 4 to 6 quarts, whereas a complete dry fill can require 12 quarts or more depending on the vehicle.
🎯 Key Takeaways
- Add fluid in small 0.5-quart increments to prevent accidental overfilling.
- The distance between ‘Min’ and ‘Max’ marks usually represents 1 pint to 1 quart.
- A standard pan-drop service uses significantly less fluid than a total system flush.
- Always verify fluid levels while the engine is running and at operating temperature.
- Overfilling can cause fluid aeration, leading to shifting issues and seal damage.
If you are looking to top off a low transmission, you usually need less than one quart of fluid to reach the correct level. For a standard maintenance service, such as a pan drop and filter change, most passenger vehicles require between 4 and 6 quarts. The exact amount depends heavily on whether you are simply correcting a low dipstick reading or performing a full fluid exchange.

Getting this volume right is critical for your vehicle’s health. Adding too much fluid is just as dangerous as running too little. Overfilling leads to fluid “foaming” or aeration as the moving parts whip air into the liquid. This reduces lubrication and creates heat. By following a precise, incremental approach, you ensure the transmission operates at the correct pressure without risking internal seals or clutch slippage.
Understanding Capacity Variations: Pan Drop vs. Total System Fill
The most common mistake DIYers make is confusing “service capacity” with “total capacity.” Your transmission holds fluid in several areas, including the pan, the torque converter, the cooling lines, and the internal valve body. When you pull the drain plug or drop the pan, you are only removing a fraction of the total fluid.

Service Refill vs. Dry Fill Volume
You must identify which procedure you are performing to avoid a massive overfill. A “dry fill” capacity is only relevant if the transmission was just rebuilt or replaced. For routine maintenance, you are almost always dealing with a “service refill” volume.
- Routine Top-Off: Usually requires 0.25 to 1 quart. This is for correcting a level that has dropped due to a minor leak or evaporation over time.
- Pan Drop & Filter Change: Typically requires 3 to 6 quarts. This drains the pan but leaves fluid in the torque converter and lines.
- Torque Converter Drain: If your vehicle allows you to drain the converter separately, you may need an additional 4 to 7 quarts.
- Total System Capacity (Dry Fill): Usually ranges from 10 to 16 quarts depending on the size of the vehicle and the cooling system.
Practical Capacity Examples
To give you a better idea of what to expect, consider these common scenarios. A compact sedan with a small four-speed automatic might only need 3.5 quarts after a pan drop. Conversely, a heavy-duty pickup truck with a deep pan and a large external cooler could easily take 7 or 8 quarts just for a basic service. Always check your owner’s manual for the “Service Refill” specification specifically, rather than the “Total System Capacity.”
Master Proper Transmission Fluid Levels in 7 Simple Steps
Checking and adding transmission fluid is a vital maintenance task that ensures your vehicle shifts smoothly and your gears remain protected from excessive heat and friction. Unlike engine oil, transmission fluid operates in a closed system and doesn’t “burn off,” so a low level usually indicates a leak or a long-overdue service. This guide will walk you through the precise process of determining exactly how much fluid to add to prevent the catastrophic damage caused by both underfilling and overfilling your transmission system.
Step 1: Prepare the Vehicle and Ensure Safety
What you need: A level parking surface, parking brake engaged, and safety glasses.
Instructions: To get an accurate reading of how much fluid you need, the vehicle must be on a completely level surface. If the car is slanted, the fluid will pool at one end of the transmission pan, giving you a false reading on the dipstick. Start your engine and let it run until it reaches normal operating temperature; transmission fluid expands significantly when heated, and most dipsticks are calibrated for “Hot” readings. Ensure the parking brake is firmly set. While the engine is idling in “Park” (or “Neutral” for some specific brands like Chrysler or Honda—check your manual), you are ready to begin. Never attempt this while the engine is off unless your owner’s manual specifically dictates a “Cold” check procedure.
Pro Tip: Always check your owner’s manual first. Some modern vehicles have “sealed” transmissions with no dipstick, requiring a much more complex process involving a lift and a fluid-fill plug located underneath the chassis.
Step 2: Locate and Identify the Correct Dipstick
What you need: Your vehicle’s owner’s manual and a flashlight.
Instructions: Open the hood and look for the transmission dipstick handle. It is often colored red, pink, or yellow to distinguish it from the engine oil dipstick (which is usually orange or black). On rear-wheel-drive vehicles, the dipstick is typically located toward the back of the engine bay near the firewall. On front-wheel-drive vehicles, it is usually located toward the front or side of the transmission housing. If you cannot find it, consult your manual, as some manufacturers hide the dipstick or use a bolt-down cap to prevent accidental contamination. Ensure the area around the dipstick is clean before pulling it out; even a tiny grain of sand falling into the transmission tube can cause internal scoring and valve body failure.
Pro Tip: Do not confuse the transmission dipstick with the engine oil dipstick. Adding transmission fluid to your engine oil (or vice versa) can lead to immediate and expensive mechanical failure.
Step 3: Perform the Initial Level Check
What you need: A clean, lint-free white rag or high-quality paper towel.
Instructions: With the engine still idling, pull the dipstick out completely. Wipe it clean with your lint-free rag. Notice the markings on the end of the stick; there are usually two areas: “Cold” and “Hot” (or “Add” and “Full”). Reinsert the dipstick fully into the tube, wait one second, and pull it back out. Hold it horizontally to prevent the fluid from running up or down the metal, which would obscure the reading. Look at where the liquid “line” ends. If the fluid is at or below the “Add” or “Cold” mark while the engine is hot, you definitely need to add fluid. Note the color as well; it should be translucent red. If it is dark brown or smells burnt, adding fluid is only a temporary fix for a larger mechanical issue.
Pro Tip: Always use a lint-free rag. Standard shop towels can leave behind tiny fibers that can clog the microscopic passages in the transmission’s hydraulic control unit.
Step 4: Calculate the Required Fluid Amount
What you need: The specific type of Automatic Transmission Fluid (ATF) recommended for your car.
Instructions: This is the most critical step: determining the volume. The distance between the “Add” and “Full” marks on most transmission dipsticks represents approximately one pint to one-half quart (roughly 0.25 to 0.5 liters). It is rarely a full quart. Because overfilling a transmission is dangerous—it causes the fluid to foam, leading to erratic shifting and seal failure—you must add fluid in very small increments. If the reading is just below the “Hot” mark, you might only need a few ounces. If the dipstick is bone dry, start with half a quart, but never dump an entire quart in at once without re-checking the level. Precision is much more important here than it is with engine oil.
Pro Tip: Different vehicles require very specific types of fluid (e.g., Dexron VI, Mercon V, ATF+4). Using the wrong “universal” fluid can destroy the friction modifiers in your transmission, leading to “shudder” or total slippage.
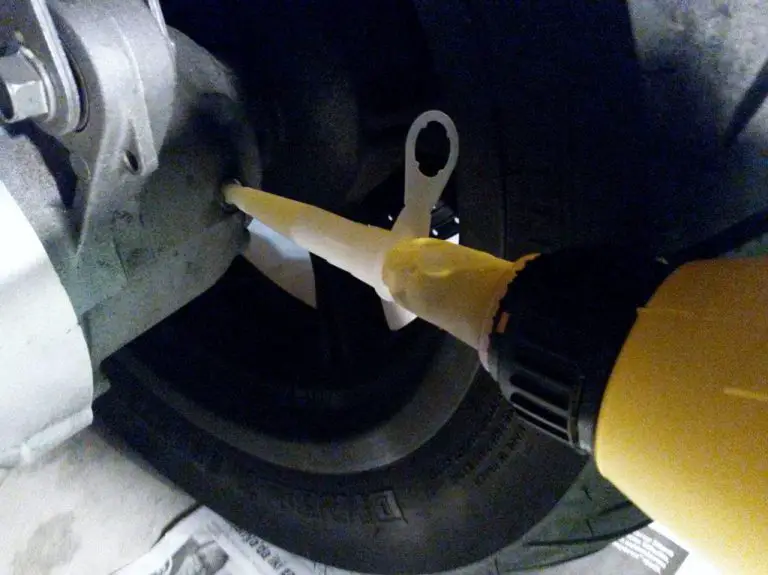
Step 5: Add the Fluid Slowly
What you need: A long-neck funnel and the correct ATF.
Instructions: Place the long-neck funnel into the transmission dipstick tube. Ensure the funnel is perfectly clean and free of dust or leftover motor oil. Pour the fluid slowly. If you determined you were about half a quart low, pour in about a quarter of a quart first. Because the tube is narrow, the fluid takes time to travel down into the pan. If you pour too fast, it can back up and spill onto the hot exhaust manifold, creating smoke and a potential fire hazard. After pouring your initial small amount, wait at least two to three minutes for the fluid to settle into the pan before attempting to read the dipstick again. This prevents “streaking” on the dipstick which makes the level impossible to read.
Pro Tip: Keep the bottle tilted so the air can escape as the fluid pours; this prevents the “glug-glug” motion that causes splashes and spills.
Step 6: Cycle Through the Gears
What you need: Access to the driver’s seat while the engine is running.
Instructions: After adding the initial amount of fluid and letting it settle, get into the driver’s seat. With your foot firmly on the brake, slowly shift the transmission through every gear position (Park, Reverse, Neutral, Drive, Low). Hold the shifter in each position for about 5 to 10 seconds. This process allows the newly added fluid to circulate through the valve body, the torque converter, and the cooling lines. This ensures that when you take your final measurement, the fluid is distributed exactly as it would be during normal driving. Once you have cycled through all gears, return the shifter to “Park” (or “Neutral” if required by your manual) and prepare for the final verification.
Pro Tip: If you hear a whining noise while cycling through gears, the level is likely still too low, and the pump is sucking in air.
Step 7: Conduct the Final Verification
What you need: Your lint-free rag and the dipstick.
Instructions: With the engine still idling and the fluid now circulated, perform one last dipstick check. Pull the stick, wipe it, reinsert it fully, and pull it out again. The fluid level should now be comfortably between the “Add” and “Full” marks, or right at the “Hot” line if the vehicle is fully warmed up. If it is still low, add fluid in tiny 2-ounce increments until it reaches the target. If you have accidentally overfilled it (the level is significantly above the “Full” or “Hot” mark), you must use a fluid extraction pump or drain some fluid from the pan before driving, as overfilling causes aeration and overheating. Once satisfied, push the dipstick back in firmly until it clicks or seals to prevent moisture from entering the system.
Pro Tip: Check the ground under the vehicle for any fresh drips. Sometimes the act of adding fluid can reveal a leak in the dipstick tube seal or the cooling lines.
✅ Final Checklist
- The vehicle was on level ground and the engine was at operating temperature during the final check.
- The fluid level is exactly between the “Add” and “Full” marks (or at the “Hot” line).
- The correct type of ATF (matching the manufacturer’s spec) was used.
- The dipstick is fully seated and the handle is locked or clicked into place.
- No fluid was spilled on hot engine components or the exhaust manifold.
Important Notes:
- Safety Warning: Transmission fluid is highly flammable and the engine bay is hot. Work carefully and avoid touching the radiator or exhaust components.
- When to Seek Professional Help: If the fluid is black, smells like burnt toast, contains metal flakes, or if the level continues to drop significantly over a few days.
- Estimated Time: 20–30 minutes (including engine warm-up time).
- Cost Range: $10 – $25 for a quart of high-quality synthetic ATF and a funnel.
Interpreting Dipstick Graduations and Incremental Volume
The transmission dipstick is your most accurate tool, but it is not a linear scale like a measuring cup. The distance between the “Add” (or Cold) mark and the “Full” (or Hot) mark represents a very specific, small volume of fluid. On most vehicles, the gap between the low mark and the high mark represents exactly one pint (0.5 quarts).

The “Add and Check” Method: The 0.5-Quart Rule
To avoid overfilling, you must use the “Add and Check” method. This is the only way to reach the “Hot” mark precisely. Because transmission fluid expands significantly when it reaches operating temperature, a reading that looks “fine” when the engine is cold might actually be overfull once you start driving.
- Start Small: If your dipstick shows the level is below the “Add” line, start by adding only 0.5 quarts (half a bottle).
- Cycle the Gears: With your foot on the brake, slowly shift through every gear (P, R, N, D, L) and back to Park. This helps the new fluid circulate through the valve body.
- Wait and Re-check: Let the vehicle idle for two minutes. Pull the dipstick, wipe it clean, and check the level again.
- Repeat Increments: If the level is still low, add only 0.25 quarts (one-quarter bottle) at a time. Continuing in smaller increments as you approach the “Hot” mark prevents you from crossing the line.
Reading the “Cold” vs. “Hot” Marks
Most dipsticks have two sets of markings. The “Cold” marks are strictly for a preliminary check after a repair to ensure there is enough fluid to safely start the engine. You should never consider the job finished based on a cold reading. The fluid level is only accurate once the transmission is at full operating temperature. This usually requires 15 to 20 minutes of driving. A “full” reading on a cold transmission will almost always result in an “overfull” reading once the fluid expands at 170 degrees Fahrenheit.
- Cold Mark: Use this only to verify you have enough fluid to drive the car to warm it up.
- Hot Mark: This is the “Gold Standard.” Your fluid level should sit right at or slightly below the top of this mark while the engine is idling on a level surface.
- Crosshatch Area: If your dipstick has a textured or crosshatched section, the fluid should be anywhere within that zone, but ideally toward the upper 25% of the texture.
Factors Influencing Fluid Expansion and Measurement Accuracy
Getting an accurate reading on your transmission fluid is more complex than checking your oil. Transmission fluid is a highly specialized hydraulic oil that reacts significantly to its environment. If you don’t account for these variables, you might end up adding fluid when your vehicle doesn’t actually need it.
The Role of Thermal Expansion
Transmission fluid expands considerably as it heats up. Most modern fluids are designed to operate between 175°F and 200°F. When the fluid reaches this “operating temperature,” its volume can increase by as much as 10% to 15% compared to when it is cold. This is why most dipsticks have two sets of markings: “Cold” and “Hot.”
- The “Cold” Reading: This is merely a reference point to ensure there is enough fluid to safely start and warm up the engine. It is rarely the final measurement.
- The “Hot” Reading: This is the most accurate reflection of the fluid level during actual driving conditions.
- The Danger of Cold Topping: If you fill the fluid to the “Full” line while the engine is cold, the fluid will likely overflow or over-pressurize once you hit the highway and temperatures rise.
Environmental and Vehicle Positioning Factors
Precision is key because the transmission pan is relatively shallow and wide. Even a slight tilt in the vehicle’s position can shift the fluid to one side, leading to a dipstick reading that is off by half a quart or more.
- Level Ground: Always ensure the vehicle is on a perfectly flat surface. Even a slightly sloped driveway will invalidate your measurement.
- Idling vs. Off: Unlike engine oil, which is checked with the engine off, most automatic transmissions require the engine to be idling in “Park” or “Neutral.” This ensures the torque converter and fluid lines are completely primed.
- Fluid Aeration: If you have just finished a long, high-speed drive, let the car idle for a few minutes before checking. This allows any tiny air bubbles to dissipate so you are measuring pure fluid, not foam.
The Technical Consequences of Incorrect Fluid Levels
Maintaining the “Goldilocks” zone—not too much, not too little—is vital for the longevity of your gearbox. Because transmission fluid acts as a coolant, a lubricant, and a hydraulic medium, any deviation from the recommended capacity causes a cascading failure of these three functions.
The Dangers of Low Fluid Levels (Underfilling)
When you haven’t added enough fluid, the most immediate issue is a drop in hydraulic pressure. Your transmission relies on this pressure to engage clutches and shift gears. Without enough “push” from the fluid, the internal components will struggle to grab, leading to “slipping.”
- Increased Friction: Lower volume means the remaining fluid must work harder, leading to rapid overheating.
- Delayed Engagement: You may notice a “hesitation” when shifting from Park to Drive.
- Erratic Shifting: The computer may struggle to find the right gear, leading to “hunting” or harsh gear slams.
The Risks of Excessive Fluid (Overfilling)
Many DIYers assume that a little extra fluid is a “safety net,” but overfilling can be just as destructive as underfilling. When the fluid level is too high, it reaches the rotating internal parts of the transmission, which act like a high-speed blender.
- Fluid Aeration (Foaming): The rotating gears whip air into the fluid. Air cannot be compressed and does not lubricate well. This “foamy” fluid fails to protect the metal surfaces, leading to rapid wear.
- Blown Seals: Excess fluid creates excessive internal pressure. This pressure often finds the weakest point—usually a rubber seal or gasket—causing a permanent leak.
- Vent Blow-by: In extreme cases, the transmission may “burp” hot fluid out of the vent tube, which can land on hot exhaust components and create a fire hazard.
Conclusion
Determining exactly how much transmission fluid to add is a balancing act that requires patience and precision. Whether you are performing a minor top-off of a few ounces or refilling several quarts after a pan drop, the goal is always to stay within the manufacturer’s specified range on the dipstick. Remember that fluid expands with heat, so a “full” reading on a cold engine is often an overfilled engine in disguise. Always prioritize accuracy over speed to avoid the costly mechanical failures associated with incorrect levels.
Next Steps: Check your owner’s manual for your vehicle’s specific “total fill” versus “service fill” capacities. If you find yourself consistently adding fluid, schedule an inspection to identify potential leaks before they lead to transmission failure. Stay proactive with your maintenance, and your vehicle will reward you with thousands of miles of smooth, reliable shifting!
💬 Quick Questions & Answers
How much fluid is needed if the dipstick is at the ‘Add’ mark?
Typically, adding 0.5 to 1 quart will bring the level from the ‘Add’ or ‘Low’ mark to the ‘Full’ line.
What is the average capacity for a transmission pan service?
A standard filter and fluid change usually requires between 4 and 6 quarts of fresh fluid.
Should I add fluid while the engine is running or off?
You should add fluid while the engine is running and the vehicle is in Park or Neutral to ensure circulation.
How much fluid does a torque converter hold?
A torque converter can hold between 2 and 4 quarts, which is why a drain-and-fill doesn’t remove all fluid.
Is a dry fill different from a routine service?
Yes, a dry fill (after a rebuild) requires 10 to 15 quarts, nearly double the amount of a routine service.
❓ Frequently Asked Questions
Why is there such a large difference between service fill and total capacity?
A service fill only replaces the fluid in the pan. Several quarts remain trapped in the torque converter, cooling lines, and internal clutch drums, which are not emptied during a simple pan drop.
How do I know if I have added too much transmission fluid?
Check the dipstick after the vehicle is warm; if the fluid is above the ‘Hot’ mark or looks foamy/bubbly, the system is overfilled and needs to be drained.
What happens if I overfill the transmission by one quart?
Overfilling can cause the rotating internal parts to whip air into the fluid. This foam reduces lubrication, causes overheating, and can lead to erratic shifting or seal failure.
Does the vehicle need to be in Park or Neutral when checking the level?
While most vehicles require the transmission to be in Park, some manufacturers (like Chrysler/Dodge) specifically require checking in Neutral. Always consult your owner’s manual for the exact requirement.
How much fluid is typically lost during a cooler line repair?
Usually, less than a quart of fluid is lost during a line repair, but you should still use the ‘Add and Check’ method to ensure the level remains within the safe operating zone.
Why does the fluid level look different when the engine is cold?
Transmission fluid expands significantly as it reaches operating temperature. The ‘Cold’ mark is only a preliminary gauge; the ‘Hot’ mark is the only accurate way to confirm the final level.