2014 Chevy Captiva Transmission Fluid Change Light Reset – Mastering Guides
Ah, the 2014 Chevy Captiva—a marvel of automotive engineering that has won the hearts of many. If you’re the proud owner of…
Ah, the 2014 Chevy Captiva—a marvel of automotive engineering that has won the hearts of many. If you’re the proud owner of this gem, you know that its performance is second to none, especially when it comes to its transmission system. But let’s face it, even the best machines require regular upkeep to maintain their peak performance.
Changing the transmission fluid and resetting the light in a 2014 Chevy Captiva is crucial for optimal performance. This guide provides a comprehensive step-by-step approach to help you master these tasks effortlessly.
The Importance of Transmission Fluid
One of the most overlooked aspects of car maintenance is the transmission fluid. This vital liquid serves as the lifeblood of your transmission system, ensuring smooth gear shifts and optimal engine performance. Neglecting it can lead to a host of problems, from minor annoyances to major repairs that could cost you dearly.
To reset the transmission fluid change light on a 2014 Chevy Captiva, you can follow short steps:
- Turn the ignition key to the “ON” position, but do not start the engine.
- Press the “MENU” button on the turn signal lever to display the “Vehicle Information Menu” on the instrument panel.
- Use the thumbwheel on the turn signal lever to scroll through the menu items until you reach the “Transmission Fluid” or “Remaining Oil Life” screen.
- Once you are on the “Transmission Fluid” or “Remaining Oil Life” screen, press and hold the “SET/CLR” button on the end of the turn signal lever.
- The display will show a confirmation message asking if you want to reset the transmission fluid life. Use the thumbwheel to highlight “Yes” and then press the “SET/CLR” button to select it.
- The transmission fluid life will reset to 100%.
- Turn off the ignition.
Reset Oil Maintenance Light – 2011 to 2014 Chevy Captiva
Resetting the Transmission Fluid Change Light
So, you’ve rolled up your sleeves and successfully changed the transmission fluid in your 2014 Chevy Captiva. Give yourself a pat on the back; that’s no small feat! But before you hit the road, there’s one last step to ensure your vehicle’s system is fully updated: resetting the transmission fluid change light.
This step is crucial as it resets your vehicle’s internal computer, ensuring it accurately tracks your next maintenance schedule.
Tools and Preparations
Tools Needed
- OBD2 Scanner: This is the magic wand that will reset your light. Make sure it’s compatible with your vehicle.
- Flat-Head Screwdriver: Some OBD2 ports have a cover that needs to be removed.
- Owner’s Manual: Always good to have for any troubleshooting.
Preparations
- Read the Owner’s Manual: Before you start, skim through the owner’s manual to understand any specific instructions related to the OBD2 port or resetting warning lights.
- Safety First: Ensure your vehicle is parked on a level surface, the gear is in ‘Park,’ and the ignition is off.
Details Guide to Resetting The Transmission Fluid Change Light
Step 1: Locate the OBD2 Port

The OBD2 port is generally located under the dashboard near the driver’s side. In some models, it might be covered for safety. Use your flat-head screwdriver to gently remove the cover.
Step 2: Connect the OBD2 Scanner

Plug your OBD2 scanner into the port. Ensure the scanner is fully inserted for a secure connection.
Step 3: Power Up the System
Turn your ignition key to the “On” position but don’t start the engine. This will provide the power needed for the OBD2 scanner to operate.
Step 4: Navigate the Scanner Menu
Once the scanner is powered up, it will display a menu. Use the navigation buttons to select “Vehicle Diagnostics” and then navigate to “Transmission Fluid Change Light Reset.”
Step 5: Initiate the Reset
After selecting the correct option, press “Enter” or “Confirm” on your scanner.
Step 6: Monitor the Process
The scanner will now communicate with your vehicle’s computer. You’ll see a progress bar or a message indicating that the reset is in process. Once complete, the scanner will display a confirmation message.
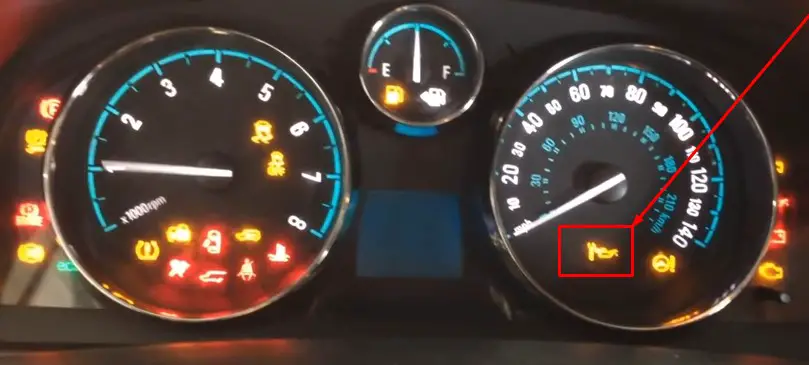
Step 7: Verify the Reset
Turn off the ignition and then start the engine. Look at your dashboard to confirm that the transmission fluid change light has been reset. If it’s off, you’ve successfully completed the process.
Troubleshooting and Professional Help
If you’ve followed all these steps and the light hasn’t reset, it’s time to consider professional help. A persistent light could indicate a more complex issue with the transmission system that requires diagnostic tests beyond the capabilities of a standard OBD2 scanner.
- You Can See: Allison Transmission Won’t Shift Into Gear.
How to Check Transmission Fluid in 2014 Chevy Captiva
Before you even think about changing the transmission fluid, it’s crucial to know how to check its current state. This is a simple yet essential task that can save you from potential headaches down the road. So, let’s get started.
Tools You’ll Need
Before diving in, make sure you have the following tools at your disposal:
- Transmission Fluid Dipstick: This is your primary tool for checking the fluid level.
- Protective Gloves: Safety first! These will protect your hands from any hot or corrosive fluids.
- Clean Cloth or Paper Towel: For wiping the dipstick clean.
4-Step Check Transmission Fluid
Step 1: Park the Car
Park your 2014 Chevy Captiva on a level surface to ensure an accurate reading. Make sure the engine is off and the car is in ‘Park’ mode.
Step 2: Open the Hood
Locate the hood release lever inside your car, usually near the driver’s side. Pull it to pop the hood open.
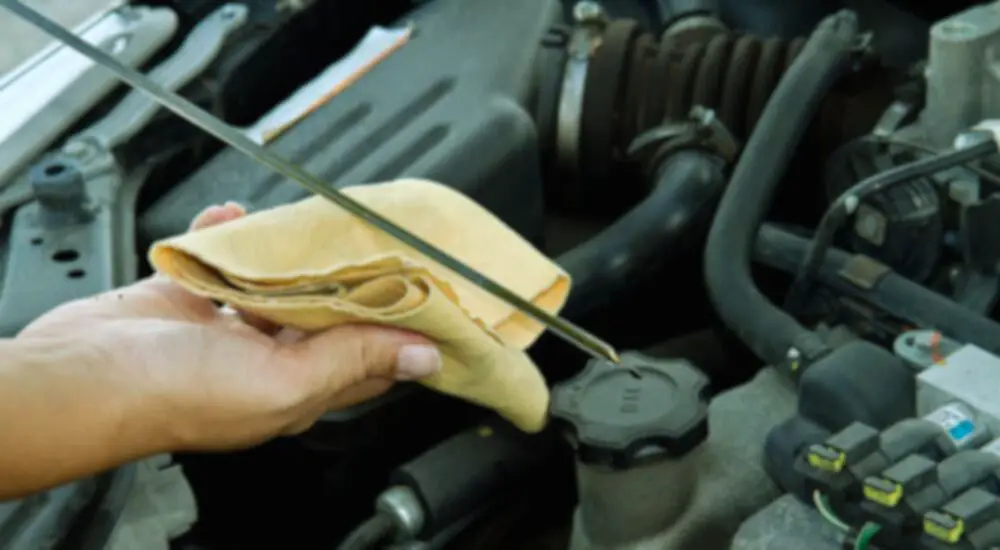
Step 3: Locate the Dipstick
Open the hood and locate the transmission fluid dipstick. It’s usually marked with a bright handle for easy identification.
Step 4: Check the Fluid
- Pull out the dipstick and wipe it clean with your cloth or paper towel.
- Reinsert the dipstick fully into its tube.
- Pull it out again and observe the fluid level and color.
Note: The fluid should be between the “Low” and “Full” marks on the dipstick. The color should be a clear red. If it’s brown or has a burnt smell, it’s time for a change.
- You Can See: How to Check Transmission Fluid on 2007 Dodge Charger.
Changing the Transmission Fluid
Changing the transmission fluid in your 2014 Chevy Captiva is a critical maintenance task that ensures the longevity and performance of your vehicle. While it might seem daunting, with the right tools and a bit of guidance, you can do it yourself.
- You Can See: Mercon LV Transmission Fluid Equivalent.
Tools Required
- Wrench: To remove the drain plug.
- Drain Pan: To collect the old fluid.
- Funnel: To pour the new fluid into the transmission.
- Protective Gloves: To protect your hands.
- Safety Glasses: To protect your eyes.
A few steps to change the Transmission Fluid
Step 1: Prepare Your Vehicle
Park your vehicle on a level surface and engage the parking brake. Start the engine and let it run for a few minutes to warm up the transmission fluid.
Step 2: Locate the Drain Plug
The drain plug is located at the bottom of the transmission pan. Place your drain pan underneath to catch the old fluid.
Step 3: Drain the Old Fluid
Using your wrench, carefully remove the drain plug and allow the old fluid to drain into the pan. Be careful as the fluid may be hot.
Step 4: Replace the Drain Plug
Once all the old fluid has drained out, replace the drain plug and tighten it securely.
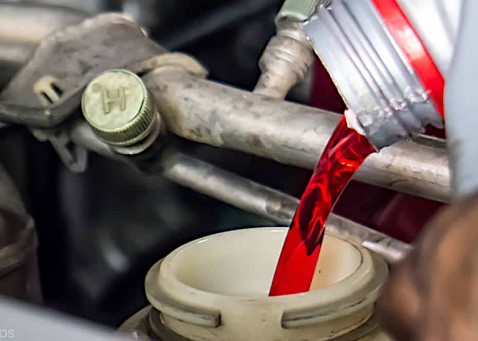
Step 5: Refill with New Fluid
Locate the transmission fluid dipstick tube. Remove the dipstick and insert a funnel. Slowly pour the new transmission fluid into the funnel. Be sure not to overfill. The owner’s manual for the 2014 Chevy Captiva recommends a total capacity of 9.5 quarts (9 liters) for a complete change.
Step 6: Check the Fluid Level
Start the engine and let it run for a few minutes. Then, with the engine running, check the fluid level using the dipstick. It should be between the “Low” and “Full” marks.
Step 7: Test Drive
Take your vehicle for a short test drive to ensure the transmission is shifting smoothly. If you notice any issues, it’s best to seek professional help.
Product Recommendation: ACDelco Dexron-VI Automatic Transmission Fluid – This is the recommended fluid for your 2014 Chevy Captiva.
Frequently Asked Questions
What Kind of Oil Does a 2014 Chevy Captiva Take?
The 2014 Chevy Captiva requires Dexron-VI automatic transmission fluid for optimal performance. This fluid is specially formulated for GM vehicles and ensures smooth gear shifts and longevity.
Where is the 2014 Chevy Captiva Transmission Fluid Dipstick Located?
The transmission fluid dipstick is usually located under the hood, near the back of the engine. It’s marked with a bright handle for easy identification.
How to Change the Transmission Fluid on the 2013 Chevy Captiva?
The process for changing the transmission fluid on a 2013 Chevy Captiva is similar to the 2014 model. However, always consult your owner’s manual for any model-specific instructions.
How Often Should the Transmission Fluid Be Changed?
For the 2014 Chevy Captiva, it’s recommended to change the transmission fluid every 45,000 miles or every 3 years, whichever comes first. However, if you frequently drive in harsh conditions, you may need to change it more often.
What to Do if the Transmission Fluid Light Doesn’t Reset?
If the transmission fluid light doesn’t reset even after following the steps, it’s advisable to seek professional help. A persistent light could indicate a more complex issue that requires specialized diagnostic tests.
Can I Use Any Other Type of Transmission Fluid?
It’s strongly recommended to use only the specified Dexron-VI automatic transmission fluid for your 2014 Chevy Captiva. Using a different type could lead to performance issues and may void your warranty.
Conclusion
Maintaining your vehicle is crucial for its longevity and performance, and the transmission system is no exception. The 2014 Chevy Captiva, with its advanced features and robust design, requires regular maintenance to ensure it runs smoothly for years to come.
In this guide, we’ve covered everything you need to know about changing the transmission fluid and resetting the transmission fluid change light in your 2014 Chevy Captiva.
From understanding the importance of the transmission fluid light to a step-by-step guide on changing the fluid and resetting the light, we’ve got you covered.
Remember, regular maintenance is key to preventing costly repairs down the line. By following this guide and keeping an eye on your vehicle’s warning lights, you can ensure your 2014 Chevy Captiva stays in top shape.
See Also:
- Transmission Oil Pan Torque Specs.
- Dexron 2 Transmission Fluid Equivalent.
- Mercon LV Transmission Fluid Equivalent.
- Allison Transmission Won’t Shift Into Gear.
- 2013 Infiniti JX35 Transmission Recall.