
How to Use a Portable Tire Inflator Safely and Correctly

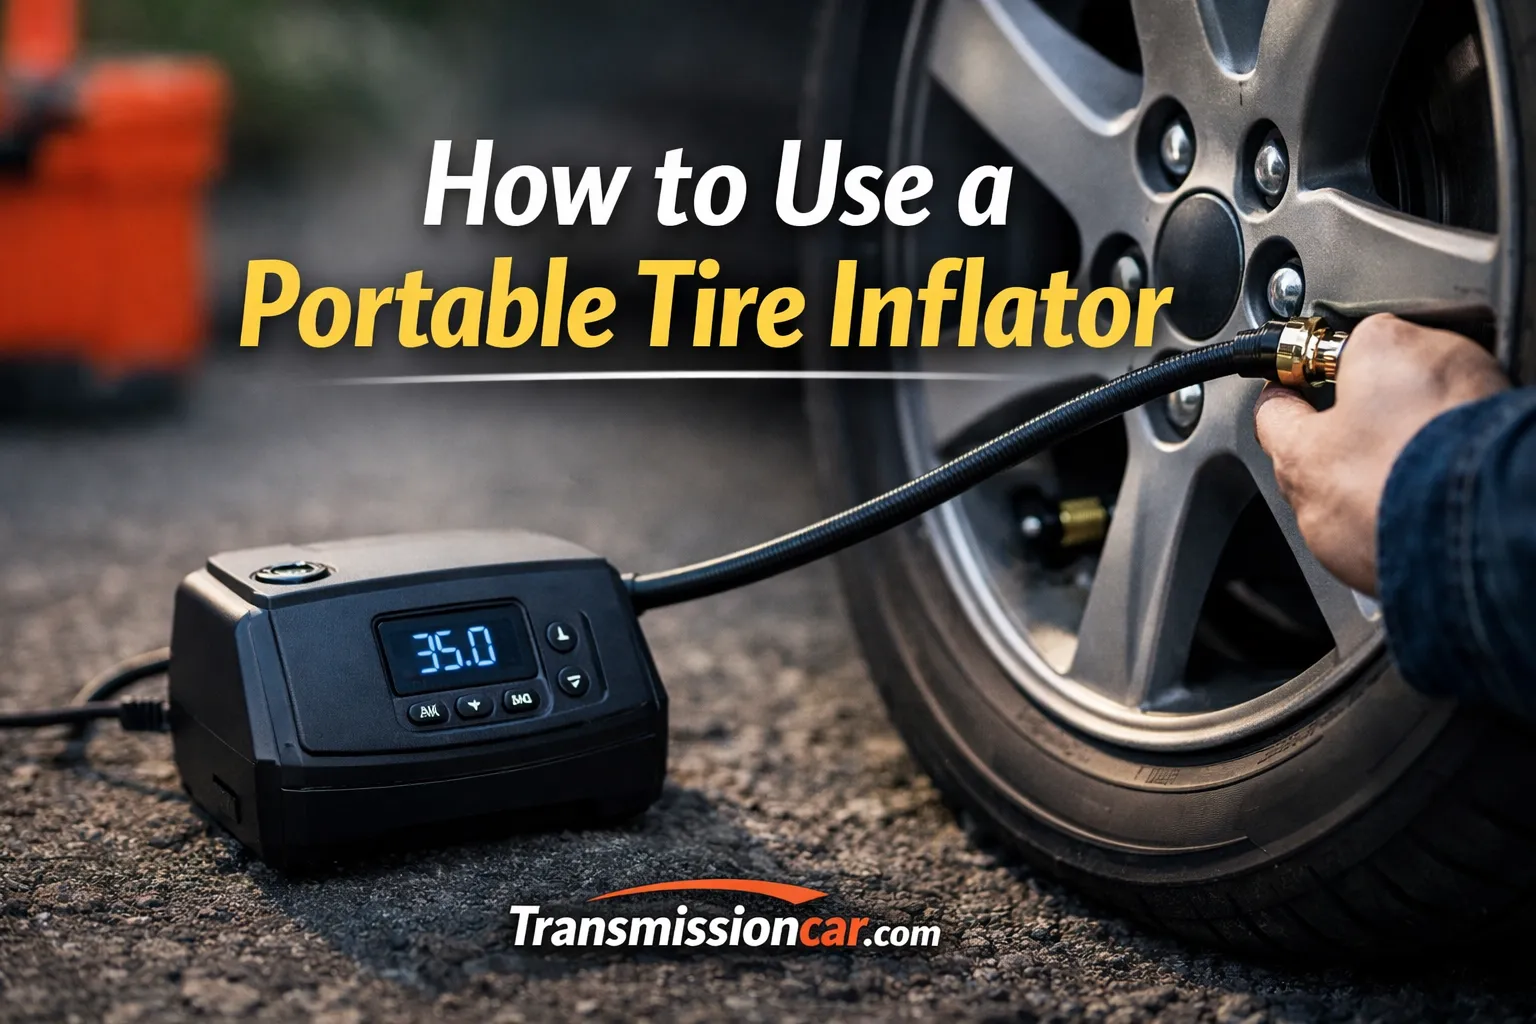
A low tire can appear at the worst possible time—before work, during a road trip, or when no gas-station air pump is nearby. A portable tire inflator lets you add air at home or beside the road, but using it incorrectly can leave the tire underinflated, overinflated, or damaged.
Learning how to use a portable tire inflator is simple once you know the correct tire pressure, power connection, and safety steps. This guide explains how to prepare the vehicle, connect the inflator, set the pressure, avoid common mistakes, and recognize when adding air is not enough.
Quick Answer
To use a portable tire inflator, park safely, find the recommended tire pressure on the driver-side door placard, connect the inflator to its power source, attach the hose firmly to the valve stem, and add air in short intervals. Stop at the recommended PSI, verify the pressure, and reinstall the valve cap.
What Is a Portable Tire Inflator?
A portable tire inflator is a small electric air compressor designed to add air to vehicle tires. Depending on the model, it may receive power from:
- A vehicle’s 12-volt accessory outlet
- A rechargeable battery
- The vehicle battery through alligator clamps
- A household electrical outlet
- More than one of these power sources
Many modern inflators have a digital pressure display and an automatic shutoff feature. You enter the desired pressure, start the machine, and it stops when it reaches that setting.
Portable inflators are useful for routine pressure adjustments and minor pressure loss. However, they are not a permanent repair for a puncture, damaged valve stem, cracked wheel, or torn tire sidewall.
Why Correct Tire Pressure Matters
Tire pressure affects steering, braking, ride comfort, fuel use, heat buildup, and tire wear. An underinflated tire flexes more as it rolls, which can generate excess heat and damage the tire. An overinflated tire may provide a harsher ride and reduce the tire’s ability to absorb road impacts.
According to the NHTSA TireWise tire safety guidance, drivers should check all tires, including the spare, at least once a month when the tires are cold. NHTSA also explains that the correct pressure is listed on the vehicle’s tire information label or in the owner’s manual—not on the tire sidewall. (NHTSA)
Proper inflation can also reduce unnecessary fuel use. The U.S. Department of Energy’s vehicle-efficiency guidance notes that underinflated tires can reduce fuel economy, while maintaining the recommended pressure can improve efficiency and tire performance. (energy.gov)
What You Need Before Inflating a Tire
Prepare the following items:
- A portable tire inflator
- The correct power cord, battery, or clamps
- A separate tire pressure gauge, if available
- A flashlight for nighttime use
- Work gloves
- Your vehicle owner’s manual
- The inflator’s instruction manual
A separate pressure gauge is helpful because the gauge built into a low-cost inflator may not always match a trusted handheld gauge exactly.
Check the Inflator Before Use
Before connecting anything, inspect the inflator for:
- A cracked or damaged air hose
- Exposed electrical wires
- A loose plug or battery connection
- Corrosion on battery clamps
- A damaged valve connector
- Low battery charge
- Signs of overheating from previous use
Do not use an inflator with damaged wiring or a severely cracked hose. Electrical faults and air leaks can make the unit unsafe or prevent accurate inflation.
Find the Correct Tire Pressure
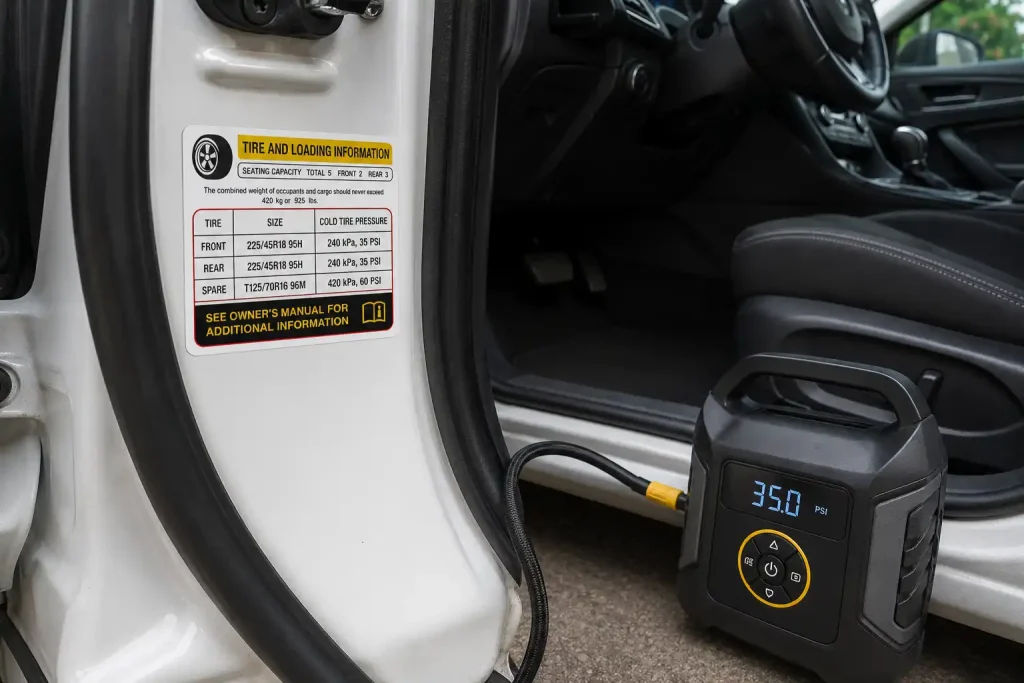
Open the driver-side door and look for the Tire and Loading Information label. It is normally attached to the door jamb, door edge, or nearby body pillar.
The label usually shows:
- Recommended front tire pressure
- Recommended rear tire pressure
- Original tire size
- Vehicle load information
Some vehicles require different pressures in the front and rear tires. Do not assume that all four tires need the same PSI.
Do Not Use the Maximum PSI on the Tire
The pressure molded into the tire sidewall is generally the tire’s maximum inflation pressure under specified conditions. It is not automatically the correct operating pressure for your vehicle.
The NHTSA winter driving recommendations specifically advise drivers to follow the vehicle manufacturer’s recommended pressure shown on the driver-side door label, rather than the maximum pressure printed on the tire. (NHTSA)
What Does PSI Mean?
PSI means pounds per square inch. It measures the pressure of the air inside the tire.
For example, if your door placard recommends 35 PSI, your goal is to adjust the tire to approximately 35 PSI when the tire is cold—not to inflate it to the highest number printed on the sidewall.
How to Use a Portable Tire Inflator Step by Step
1. Park in a Safe Location
Park on a flat, stable surface away from moving traffic. Shift the transmission into Park for an automatic vehicle or into gear for a manual vehicle. Apply the parking brake.
If you are beside a road:
- Move as far away from traffic as possible
- Turn on the hazard lights
- Keep passengers away from traffic
- Use reflective triangles when available
- Avoid standing directly in front of or behind the vehicle
Do not attempt roadside inflation when the location exposes you to fast-moving traffic. Calling roadside assistance is safer than working in a dangerous position.
2. Check the Tires When They Are Cold
A cold tire is generally one that has not been driven for at least three hours. Driving creates heat, and heat raises the measured pressure.
If possible, inflate the tires before driving in the morning. NHTSA recommends checking pressure when tires are cold because this provides the most reliable comparison with the pressure listed on the vehicle placard. (NHTSA)
If you must add air to a warm tire because it is noticeably low, add enough air to make the vehicle safer to drive. Recheck and correct the pressure after the tire has cooled.
Do not release air from a hot tire simply because its pressure reading is above the cold specification.
3. Inspect the Tire for Visible Damage
Before adding air, look for:
- Nails or screws in the tread
- Cuts or exposed cords
- Sidewall bulges
- Cracks
- A bent or cracked wheel
- A damaged valve stem
- Separation between tire components
- A tire that has come partly off the rim
A portable inflator may temporarily raise the pressure in a leaking tire, but it cannot restore the structural strength of a damaged tire.
Do not inflate a tire with a large sidewall cut, exposed internal cords, or severe bulging. Install the spare tire or arrange towing instead.
4. Remove the Valve Stem Cap
Locate the valve stem on the wheel and unscrew its small cap. Put the cap somewhere safe so it does not roll away.
Briefly inspect the valve stem. It should not appear cracked, loose, or badly bent.
If you hear air escaping before connecting the inflator, the valve core or valve stem may be leaking.
5. Connect the Inflator to Its Power Source
Follow the instructions for your inflator type.
For a 12-Volt Inflator
Insert the power plug fully into the vehicle’s 12-volt accessory outlet. Some vehicles provide power only when the ignition is in Accessory or Run mode.
Check the inflator manual before starting the engine. If the engine must run to maintain battery voltage, operate it only outdoors in a well-ventilated location. Never run a vehicle inside a closed garage because exhaust gases can accumulate.
For a Cordless Inflator
Install a fully charged battery. Confirm that it locks securely into place.
Rechargeable inflators are convenient because there is no cord running through the vehicle. However, battery performance may decrease in very cold weather or when the battery has been stored without charging.
For a Direct-to-Battery Inflator
Keep the inflator switched off while making the connections.
Connect the clamps according to the manufacturer’s instructions. Typically:
- Attach the positive clamp to the positive battery terminal.
- Attach the negative clamp to the approved negative connection or ground point.
- Keep the cords away from belts, fans, hot exhaust parts, and other moving components.
Reversing the clamps can damage the inflator or the vehicle’s electrical system.
6. Attach the Air Hose to the Valve Stem
Press or screw the hose connector onto the valve stem until it is secure.
Common connector designs include:
- Screw-on connectors
- Lever-lock connectors
- Push-on chucks
- Quick-connect fittings
A brief hiss while attaching the connector is normal. Continuous hissing usually means the connector is not seated correctly.
Reposition it until the connection is firm and air is no longer escaping.
7. Read the Current Pressure
Turn on the display or allow the inflator to measure the tire.
Compare the reading with the pressure on the vehicle placard. If the inflator shows 27 PSI and the vehicle requires 35 PSI, the tire needs approximately 8 PSI of additional pressure.
Some inflators do not display the tire pressure accurately until the compressor stops. Read the product instructions to understand how its gauge operates.
8. Set the Target Pressure
If your inflator has automatic shutoff, enter the recommended PSI.
Double-check the number before starting. Accidentally entering 53 PSI instead of 35 PSI could seriously overinflate the tire.
For an inflator without automatic shutoff, add air in short intervals and monitor the pressure carefully.
9. Start the Inflator
Switch on the compressor. It may vibrate and produce a loud buzzing sound.
Watch the hose and power cord while it runs. Stop immediately if you notice:
- Smoke
- A burning smell
- Sparks
- Extreme vibration
- A rapidly expanding sidewall bulge
- A hose connection that will not stay attached
- An error message
- The unit becoming excessively hot
Small inflators may have a limited duty cycle, such as several minutes of operation followed by a cooling period. Follow the manufacturer’s stated operating and cooling times.
Running the inflator continuously beyond its limit can overheat the motor.
10. Stop at the Recommended PSI
Allow an automatic inflator to stop at the selected pressure. With a manual model, switch it off as the display approaches the correct PSI.
Pressure may change slightly after the compressor stops. Wait a few seconds and read the display again.
11. Verify the Pressure
Disconnect the inflator and check the tire with a separate gauge when possible.
If the pressure is too low, reconnect the hose and add a small amount of air.
If the pressure is slightly high, press the valve core briefly or use the inflator’s deflation button. Release air in small amounts and recheck frequently.
12. Reinstall the Valve Cap
Replace the valve cap and tighten it by hand. The cap helps keep dirt and moisture away from the valve core.
Repeat the process for the remaining tires, including the spare if it is accessible.
[IMAGE PLACEHOLDER 2]
Placement: Immediately after the step-by-step inflation instructions
Purpose: Demonstrate the correct connection between the portable inflator hose and tire valve stem
Caption: Attach the hose securely and monitor the pressure while the inflator runs.
Alt Text: How to use a portable tire inflator on a car tire
Image Prompt: A realistic automotive safety photograph showing a vehicle owner kneeling beside a parked car on a flat driveway, securely connecting a compact digital portable tire inflator to the tire valve stem, pressure display visible, parking brake applied, gloves and flashlight nearby, no visible logos or brands
Recommended Size: 900×600 px
Suggested File Name: how-to-use-portable-tire-inflator.jpg
Suggested Surrounding Text: Keep the hose straight and remain near the inflator while it is operating.
Portable Tire Inflator Types Compared
| Inflator type | Main benefit | Main limitation | Best use |
|---|---|---|---|
| 12-volt corded | Reliable power from the vehicle | Cord length may limit reach | Routine passenger-car inflation |
| Cordless rechargeable | Easy to carry and position | Battery can lose charge | Quick pressure adjustments |
| Direct-to-battery | Often provides stronger output | Requires careful clamp connection | SUVs, trucks, and larger tires |
| Dual-power | Offers corded and cordless operation | Usually larger and more expensive | Frequent use and road trips |
| High-volume inflator | Moves more air quickly | May not produce enough pressure for all tires | Air mattresses and large low-pressure items |
Before buying, compare the inflator’s maximum pressure, airflow, hose length, power-cord length, duty cycle, gauge readability, warranty, and suitability for your vehicle’s tire size.
A high maximum PSI does not necessarily mean the inflator will fill a large tire quickly. Airflow and continuous operating time also matter.
Expert Tip
Expert Tip: Write your vehicle’s front and rear cold-tire pressures on a small card and store it with the inflator. This prevents guessing during a nighttime emergency and helps you avoid confusing the recommended pressure with the maximum number printed on the tire.
How Long Does Inflation Take?
Inflation time depends on:
- Tire size
- Starting pressure
- Target pressure
- Inflator airflow
- Power source
- Ambient temperature
- Battery charge
- Hose or connector leakage
Adding two or three PSI to a passenger-car tire may take only a short time. Raising a large SUV or truck tire from very low pressure can take much longer and may require one or more cooling periods.
If the pressure barely increases, check for a loose hose connection, low battery voltage, a puncture, or an inflator that is too small for the tire.
What to Do After Inflating the Tire
Watch the tire pressure over the next several hours or days.
A tire that lost pressure because of a normal temperature change may remain stable after adjustment. A tire with a puncture or valve leak will usually lose air again.
Consider recording the pressure after inflation. Recheck it the following morning when the tire is cold.
Warning Signs the Tire Needs Professional Inspection
Arrange an inspection if:
- The same tire repeatedly loses pressure
- You hear air leaking
- The TPMS light returns
- The valve stem is cracked
- A nail or screw is visible
- The tread is separating
- The tire has a sidewall bubble
- The wheel appears bent
- The vehicle pulls after the pressures are corrected
- The tire was driven while nearly flat
Driving on a severely underinflated tire can damage its internal structure even when the outside looks normal.
Common Mistakes Vehicle Owners Should Avoid
- Using the tire sidewall pressure: Follow the vehicle placard, not the tire’s maximum PSI.
- Checking immediately after highway driving: Hot tires normally show higher pressure.
- Ignoring different front and rear specifications: Some vehicles require different pressures by axle.
- Walking away while the inflator runs: Stay nearby to monitor pressure, heat, and hose security.
- Exceeding the inflator’s duty cycle: Give the motor time to cool as directed.
- Using damaged electrical cords: Replace or repair the inflator before using it again.
- Running the engine in a closed garage: Vehicle exhaust can create a deadly indoor hazard.
- Inflating a visibly damaged tire: Air pressure cannot repair a bulge, deep cut, or exposed cord.
- Assuming the TPMS provides an exact reading: Some systems only warn after pressure has dropped significantly.
- Forgetting the spare tire: A flat spare is useless during an emergency.
- Treating repeated pressure loss as normal: Recurring loss usually needs diagnosis.
- Using tire sealant without checking compatibility: Some sealants can affect sensors or complicate professional repair.
When to Call a Transmission Professional
A low tire normally requires a tire technician or general repair shop—not a transmission specialist. However, vehicle owners sometimes mistake driveline or transmission symptoms for tire problems.
Correct the tire pressures first. Then seek professional diagnosis if the vehicle still has:
- Shuddering during acceleration
- Delayed engagement into Drive or Reverse
- Engine speed rising without matching vehicle acceleration
- Clunking when shifting
- Transmission fluid leaking
- Vibration that changes with gear selection
- A transmission or drivetrain warning message
A transmission professional can determine whether the problem comes from the transmission, driveshaft, axle, CV joint, differential, wheel, or tire.
For tire damage, repeated air loss, or wheel problems, choose a qualified tire shop. The FTC’s auto repair guidance recommends comparing repair shops, checking relevant technician experience, asking about warranties, and obtaining a written estimate before authorizing significant work. (Consumer Advice)
DIY Inflation vs. Professional Tire Service
| Situation | Portable inflator | Professional service |
|---|---|---|
| Tire is two or three PSI low | Appropriate | Usually unnecessary |
| Pressure changed with cold weather | Appropriate | Usually unnecessary |
| Tire has a small, repairable tread puncture | Temporary inflation only | Required for proper inspection and repair |
| Sidewall is cut or bulging | Do not inflate unnecessarily | Required |
| Tire repeatedly loses pressure | Temporary measure | Required |
| Valve stem leaks | May add temporary air | Required |
| Wheel is bent or cracked | Not a solution | Required |
| Tire was driven while flat | Do not assume it is safe | Required |
| Inflator cannot raise pressure | Limited usefulness | Inspection recommended |
FAQs
Can I use a portable tire inflator while the car is running?
Only when the inflator manufacturer permits it. Some 12-volt units work better with the engine running, but the vehicle must remain outdoors in a well-ventilated area. Never run an engine inside a closed garage.
Should I inflate my tires to the PSI printed on the tire?
No. Use the recommended cold pressure shown on the vehicle’s driver-side door placard or in the owner’s manual. The pressure printed on the tire is normally a maximum specification, not the vehicle’s recommended everyday setting.
Can a portable inflator fix a flat tire?
It can add air, but it cannot repair the cause of the flat. If the tire has a puncture, damaged valve, sidewall cut, or cracked wheel, it will need professional inspection and repair or replacement.
How often should I check my tire pressure?
Check it at least once a month and before long trips. Also check after a major temperature change, after hitting a pothole, or whenever the TPMS warning light appears.
Why does the inflator gauge change while the compressor is running?
The compressor creates temporary pressure pulses inside the hose. Some inflators display a more accurate tire pressure only after the motor stops. Pause the unit and allow the reading to stabilize.
What should I do if I accidentally overinflate a tire?
Switch off and disconnect the inflator. Release air slowly through the valve stem or the inflator’s deflation control. Check the pressure repeatedly until it matches the vehicle’s recommended cold PSI.
Why does my tire lose air again after I inflate it?
The tire may have a puncture, leaking valve core, cracked valve stem, bead leak, wheel damage, or internal tire damage. Mark the pressure, recheck it when cold, and arrange an inspection if the loss continues.
Conclusion
Knowing how to use a portable tire inflator can help you correct low pressure before it causes poor handling, unnecessary tire wear, or a roadside delay. Start by finding the recommended pressure on the vehicle placard, inspect the tire for damage, connect the inflator correctly, and monitor both pressure and operating temperature.
Remember that an inflator only adds air. It does not repair a puncture or make a damaged tire safe. If a tire repeatedly loses pressure, has visible damage, or was driven while nearly flat, arrange a professional inspection.
Keep the inflator charged or stored with its power cord, test it periodically, and check all tire pressures monthly. A few minutes of routine attention can help you avoid a much more expensive and dangerous tire problem.
