4L60E Bellhousing to Transmission Torque Specs
The 4L60E is a four-speed automatic transmission designed and built by General Motors. Introduced in the early 1990s, the 4L60E is a…
The 4L60E is a four-speed automatic transmission designed and built by General Motors. Introduced in the early 1990s, the 4L60E is a very common transmission used in a wide range of GM rear-wheel-drive and four-wheel-drive vehicles.
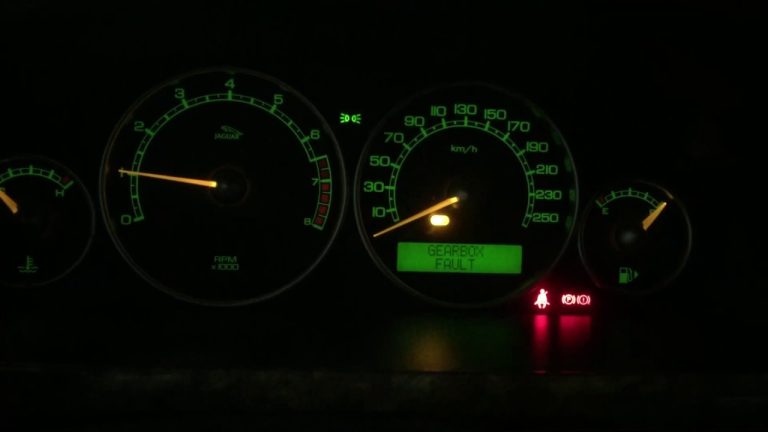
The 4L60E is an electronically controlled transmission, meaning it uses an electronic control unit or module to control transmission operation.
This allows for more precise control of shift points, line pressure, and transmission operation based on driving conditions and throttle input.
Transmission Torque Specs – Table
| Transmission Component | Torque Specs |
|---|---|
| 4L60E Bellhousing to Transmission | 37 ft-lbs (50 N·m) |
| 4L80E Bellhousing to Transmission | 40 ft-lbs (54 N·m) |
| 6L80E Pan Bolts | 12 ft-lbs (16 N·m) |
| TH350 Output Shaft Nut | 60 ft-lbs (81 N·m) |
| 4R70W Valve Body Bolts | 22 ft-lbs (30 N·m) |
| AODE Torque Converter to Flexplate | 20 ft-lbs (27 N·m) |
| C6 Extension Housing Bolts | 35 ft-lbs (47 N·m) |
HOW TO REMOVE GM 4L60E TRANSMISSION BELL HOUSING
Bellhousing to Transmission Bolt Tightening Sequence

When installing the 4L60E transmission, it’s critical to follow the proper bolt-tightening sequence to ensure there are no leaks or warping. Start with the top two bolts, then the bottom two bolts.
Work in a criss-cross pattern, tightening each bolt a little at a time until they’re all snug. Then torque each bolt to the specification in the sequence shown.
- Tighten the top left bolt
- Tighten the top right bolt
- Tighten the bottom left bolt
- Tighten the bottom right bolt
- Tighten the front left bolt
- Tighten the front right bolt
- Tighten the rear left bolt
- Tighten the rear right bolt
Torque all bell housing to transmission bolts to 30 lb-ft (40 Nm). Double-check each bolt to make sure it’s at the proper torque specification. This method will ensure even clamping force and prevent leaks or damage to the transmission.
Be very careful not to overtighten the bolts, as this can actually cause damage to the transmission case. It’s best to torque the bolts in small increments, checking the torque spec with each pass. Overtightening can lead to cracked cases, leaks, and other issues.
- You Can See: Eaton Transmission Bell Housing Torque Specs
Following the proper installation and tightening procedures for the 4L60E transmission will help ensure it provides years of reliable service. Taking the necessary time to do it right the first time is worth the effort.
Torque Specifications for the 4L60E Bellhousing
The 4L60E bellhousing attaches the transmission to the engine and proper torque specs are critical for ensuring it’s secure.
If the bellhousing bolts are not tightened correctly, it can cause damage to the transmission case or allow the bellhousing to flex, leading to shifting problems.
The 4L60E bellhousing uses 15 bolts to attach it to the transmission. The bolts are different lengths, so make sure you have the right bolts in the right holes. Tighten the bolts in a star or criss-cross pattern using the following specs:
- Bolts 1-8: 37 lb-ft (50 Nm)
- Bolts 9-12: 56 lb-ft (75 Nm)
- Bolts 13-15: 66 lb-ft (90 Nm)
Once you’ve tightened all the bolts to spec, double-check them with a torque wrench to make sure they’re accurate before installing the transmission.
It’s best to check the bellhousing bolts again after the first 50 to 100 miles of driving to ensure they have remained tight.
The 4L60E bellhousing is aluminum, so be very careful not to overtighten the bolts, which can cause damage. Only tighten each bolt once – do not loosen and re-tighten. Use a torque wrench for the most accurate results.
Properly torquing the 4L60E bellhousing bolts is one of the most important steps in a transmission installation or rebuild. Taking the time to do it right will help ensure your transmission operates as intended for years to come.
Tightening the 4L60E Bellhousing Bolts in the Right Order

The 4L60E transmission bellhousing bolts are critical to ensuring a proper seal and fit between your transmission and engine.
When reinstalling your transmission, it’s important to tighten these bolts in the correct order and to the proper torque specifications.
Make sure your transmission mounting surface on the engine block is clean and free of debris. Apply a bead of RTV silicone sealant to the mounting surface of the block, then slide the transmission into place.
Install the lower bellhousing bolts first, then the bolts around the perimeter of the bellhousing flange.
Tighten Bolts in Sequence

Tighten the bolts in sequence, starting with the lower bolts. Then work your way around, tightening opposites. This helps ensure even pressure as you go. The proper tightening sequence is:
- Bottom center bolt
- Bottom left and right bolts
- Sides – Left and right bolts
- Top left and right bolts
- Top center bolt
Torque Bolts to Spec

As you tighten the bolts in sequence, torque each bolt to the proper specification for your vehicle make and model. For most GM 4L60E transmissions, the correct torque is:
- M8 bolts: 22 ft-lbs (30 Nm)
- M10 bolts: 44 ft-lbs (60 Nm)
Be very careful not to overtighten the bolts, as this can damage the transmission case or bellhousing. It’s best to use a torque wrench to ensure accurate tightness.
Double-check that all bolts have been tightened properly. Now you’re ready to reconnect the remainder of your transmission linkages, cooler lines, and wiring harness.
Take your time and make sure each connection is secure for safe driving. Proper bellhousing bolt installation and torque are key to keeping your 4L60E transmission in working order for the long run.
Common Symptoms of an Improperly Torqued 4L60E Bellhousing
A bellhousing that isn’t properly torqued to the transmission can lead to some noticeable symptoms that indicate it needs to be fixed. If you notice any of the following with your 4L60E, it’s a good idea to check the bellhousing bolts.
Vibrations
Feeling excess vibrations in the vehicle, especially at lower speeds or idle, is a sign the bellhousing bolts may have come loose.
The bellhousing joins the engine and transmission, so if it’s not securely fastened vibrations will transfer into the cabin. Tightening or retorquing the bolts should eliminate most vibrations.
Noise
Unusual noises from the transmission like grinding, rattling, or squealing can also indicate a loose bellhousing. The components inside the transmission rely on the bellhousing to stay properly aligned.
So, if it shifts out of place it allows metal parts to grind and squeak. Re-torquing the bellhousing and inspecting the transmission may be required to diagnose and fix the source of the noises.
Leaks
If you notice transmission fluid leaking from the bellhousing area, especially a messy or heavy leak, there’s a good chance the bell-housing has become loose or cracked.
The seal between the transmission and bellhousing depends on them being tightly joined, so leaks are a symptom that needs to be re-torqued or possibly replaced. It’s best to have a mechanic inspect the bellhousing and transmission as soon as possible.
Hard Shifts
A loose or damaged bellhousing can also lead to hard shifts, delayed shifts, or the transmission slipping in and out of gear. The components that control shifting rely on the bellhousing to stay in the proper position.
Have the bellhousing torqued to the recommended 65-75 ft-lbs for a 4L60E to restore normal shifting. If the problem continues, the bellhousing or other transmission parts may need replacement.
Keeping an eye out for these symptoms and periodically checking your 4L60E’s bellhousing torque can help avoid costly damage to your transmission and ensure smooth, dependable performance.
Be sure to always follow the factory-recommended torque specs for your specific transmission model.

Frequently Asked Questions
Why is it crucial to use the correct torque specifications when assembling the bellhousing to the transmission?
Ensuring the correct torque specifications is critical to maintaining the integrity of the connection between the bellhousing and the transmission. Over-torquing can cause bolt or component failure while under-torquing can result in loose connections, misalignments, or leaks.
Do I need to apply any specific lubricants or thread lockers when torquing these bolts?
Some manufacturers may recommend applying a thread locker or anti-seize compound to the bolts to prevent loosening due to vibrations. Always refer to the manufacturer’s recommendations or the service manual for the specific procedure.
Is there a specific sequence I should follow when torquing the bellhousing to transmission bolts?
Yes, usually a crisscross or star pattern is recommended to ensure an even distribution of pressure and proper alignment. Always consult the service manual for the specific sequence applicable to the 4L60E.
How often should I check or retorque these bolts?
Once torqued to the proper specification, these bolts should not require frequent retorquing. However, if any related work or maintenance has been performed, it’s advisable to check the torque to ensure the bolts remain at the correct specification.
If I find a stripped or damaged bolt, can I replace it with any bolt of a similar size?
No, it’s essential to use bolts that meet the manufacturer’s specifications in terms of material, strength, and dimensions. Using incorrect bolts can jeopardize the integrity of the connection and potentially cause damage or failures.
Can over-torquing affect the performance or lifespan of my 4L60E transmission?
Yes, over-torquing can cause undue stress on both the bellhousing and transmission, leading to premature wear, possible cracks, or component failures. Always use a calibrated torque wrench and follow the manufacturer’s guidelines.
Conclusion
The 4L60E transmission’s bellhousing to transmission torque specifications play a pivotal role in ensuring the longevity, performance, and safety of the transmission system. Adhering to the recommended 37 ft-lbs (50 N·m) torque spec and following the manufacturer’s guidelines guarantees not only optimal performance but also reduces the risk of mechanical failures.
As with all automotive components, meticulous attention to detail, accurate use of calibrated tools, and consistent checks will aid in the seamless operation of the system. Always prioritize manufacturer guidelines and consult with expert technicians when in doubt, as this safeguards both the vehicle and its occupants.
See Also:
- Torque Specs Small Block Chevy
- Transmission Oil Pan Torque Specs
- Transmission Pan Bolts Torque Specs