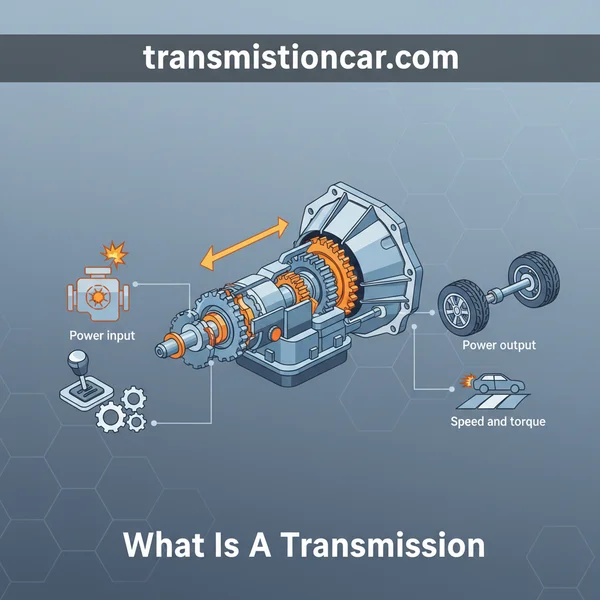
4L80E Transmission Pan Torque Specs – Explained in 2023
The 4L80E transmission stands as a beacon of engineering excellence from General Motors. For those passionate about their vehicles, understanding the nuances of this…
The 4L80E transmission stands as a beacon of engineering excellence from General Motors. For those passionate about their vehicles, understanding the nuances of this transmission, especially its torque specifications, is paramount. This guide offers an in-depth exploration into the world of the 4L80E transmission pan torque specs.
Ensuring the correct torque is applied to the 4L80E transmission pan is crucial:
- Zinc Plated Allen Head Cap Screws: These are designed for a precise fit. They should be torqued to 12-16 ft. lbs. in a cross-tightening pattern, ensuring even pressure and preventing warping.
- Drain Plug and 1/8 Pipe Plug: Vital for fluid management and sensor installations. Hand-tighten using the short side of an Allen wrench to avoid over-torquing and potential damage.
Here are those specs:
M8 bolts: 10-15 Nm (7-11 ft-lbs) M10 bolts: 15-22 Nm (11-16 ft-lbs) Once your new pan is installed, fill it with fluid and enjoy your refreshed 4L80E transmission!
| Transmission Model | 4L80E |
| Zinc Plated Allen Head Cap Screws | 12-16 ft. lbs. |
| Drain Plug | Hand-tightened |
| 1/8 Pipe Plug | Hand-tightened |
| Transmission Fluid Type | Varies (e.g., Dextron III) |
| Pan Capacity Over Stock | Approx. 4.5 quarts |
4L80E Installing transmission pan with new gasket/filter
Best Practices for 4L80E Pan Installation
Cleanliness is Key: Before installing the pan, ensure the mating surface is free from old gasket material, debris, or any contaminants.
Quality Gaskets: Always use high-quality gaskets. They play a pivotal role in preventing leaks.
Tightening Sequence: Start from the center and move outwards in a spiral pattern. This ensures even pressure distribution.
Fluid Management: Post-installation, check the transmission fluid level. Use only the recommended fluid type and ensure it’s filled to the correct level.
Draining the Fluid and Removing the 4L80E Transmission Pan
To service your 4L80E transmission, the first step is draining the old fluid and removing the pan. Make sure the engine has cooled completely if it is just running.
Place a large drain pan under the transmission to catch the drained fluid. Loosen and remove the pan bolts around the edge of the pan using a socket wrench. Let the fluid drain completely, remove the rest of the bolts, and remove the pan.
Clean the pan thoroughly with solvent to remove any debris or sludge. Inspect the pan for any cracks or other damage and replace if needed. The filter is located inside the pan, so now is a good time to replace that as well. Remove the old filter and install a new AC Delco filter, tightening by hand until snug.
With the new filter in place, you can reinstall the pan. Apply a bead of RTV sealant or gasket maker around the pan edge, then put the pan back on, threading in a few bolts to hold it in place. Tighten the bolts in a criss-cross pattern with the torque wrench to 11-15 ft-lbs.
Double-check that the pan is sealed all around, then you can refill the transmission with Dexron VI automatic transmission fluid through the filler tube. Pour in about 4 to 6 quarts at first, start the engine to circulate the fluid, then check the dipstick to add fluid until it reaches the “Full” mark.
Take your 4L80E for a short test drive to ensure there are no leaks or other issues before normal driving. Following this procedure for draining, cleaning, and resealing your transmission pan will help keep your 4L80E running strong for miles to come.
- You Can See: Transmission Pan Bolts Torque Specs
Tightening the 4L80E Transmission Pan Bolts to Spec
To ensure your 4L80E transmission lasts a long time, it’s critical to properly tighten the pan bolts according to the factory torque specifications. If the bolts are too loose, the pan can leak. Too tight and you risk damaging the pan or transmission case.
Using a torque wrench, tighten the bolts in a criss-cross pattern, starting from the center and working your way out. Make sure to lubricate the bolt threads with transmission fluid or bolt thread sealant before installation. The correct torque for the 4L80E pan bolts is 11 to 15 ft-lbs.
Once you’ve tightened the bolts to spec, double-check each one to ensure none were missed. It’s a good idea to run through them a couple of times to ensure even tightness. An improperly installed pan can cause overheating, leaks, and shifting issues, so taking your time here is well worth it.
After the pan bolts have been tightened, fill the transmission with fluid through the dipstick tube until it starts to seep out of the fill hole. Install the fill plug and start the engine to circulate the new fluid.
Shift through all gears with your foot on the brake. Recheck the fluid level and add as needed until it’s in the “full” range on the dipstick.
Filling the 4L80E Transmission with New Fluid
Now that you’ve drained the old fluid from your 4L80E transmission, it’s time to refill it with new, clean transmission fluid. For the 4L80E, you’ll want to use Dexron VI automatic transmission fluid.
Remove the Fill Plug
The fill plug is located on the passenger side of the transmission case. Remove the plug using a 3/8-inch square ratchet or breaker bar.
Add Fluid through the Fill Hole
Have a funnel ready to add the new Dexron VI fluid through the fill hole. Pour in about 4 to 5 quarts to start.
Check the Fluid Level
Locate the fluid level check plug—it’s the same size as the fill plug and located within a couple of inches of it. Remove the check plug and see if any fluid comes out. If so, you’ve added enough fluid.
If not, continue adding 1/2 quart at a time through the fill hole, rechecking the level after each addition, until fluid starts to seep out of the check hole.
Reinstall the Fill and Check Plugs
Once the proper fluid level is reached, replace the check plug and tighten it securely. Then replace the fill plug and also tighten it securely. Double-check that both plugs are tightened to the specified torque, which is 37 lb-ft.
Start the Engine and Check for Leaks
Start the engine and let it idle for a couple of minutes. Shift through all the gears to circulate the new fluid.
Shut off the engine and recheck the fluid level and check for any leaks or seepage around the fill plug and check the plug. Add fluid if needed and reseal any leaks before driving.
Recheck Fluid Level After Driving
Take your vehicle for a short drive, about 15 to 20 minutes. Upon returning, recheck the transmission fluid level with the engine running and the transmission in park.
Add fluid as needed until it’s at the proper level. Your 4L80E should now have a fresh fill of clean transmission fluid and be ready for many more miles of dependable service.
Locating the Transmission Pan on the 4L80E
To access the transmission pan on the 4L80E, you’ll need to first locate it on the underside of your vehicle.
The 4L80E is a four-speed automatic transmission, so the pan will be a large, rectangular pan toward the rear of the transmission.
Draining the Fluid
Before removing the pan, you’ll want to drain the old transmission fluid. Place a drain pan underneath the transmission to catch the fluid, then loosen the drain plug with a socket wrench and allow the fluid to drain out. Be very careful, as transmission fluid can be hot! Once drained, replace the drain plug.
Removing the Pan
With the fluid drained, you can now remove the transmission pan. Loosen and remove the bolts around the edge of the pan with a socket wrench. Have a pan ready to catch any remaining fluid.
Gently pry off the pan with a flathead screwdriver. Thoroughly clean both the transmission pans and the bottom of the transmission housing of any debris or residue before reinstalling the pan.
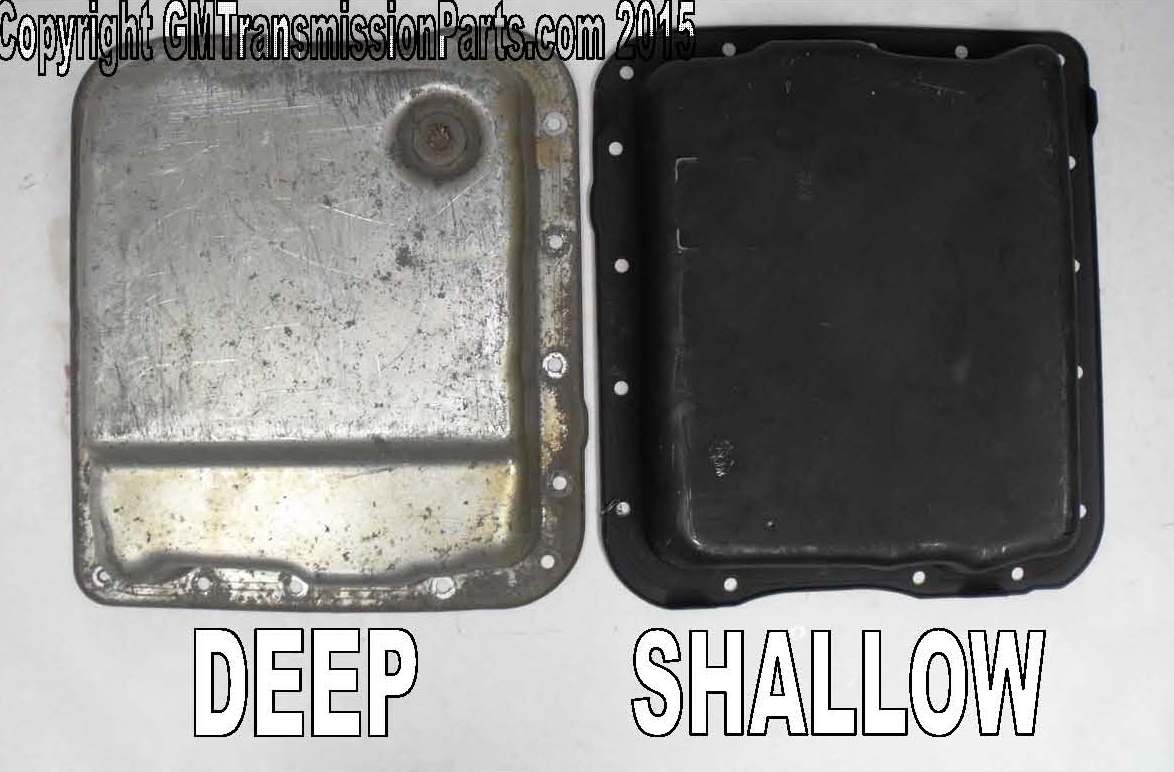
Credit: www.gmtransmissionparts.com
Frequently Asked Questions
Why is it important to torque the pan bolts to the specified value?
Proper torque ensures a good seal between the pan and the transmission, preventing leaks. Over-torquing can strip the threads or deform the pan while under-torquing can lead to fluid leaks.
Should I use any sealant with the gasket?
Always refer to the manufacturer’s recommendations. If you’re using a quality gasket, additional sealant is not required. However, if a sealant is advised, apply it sparingly and evenly.
In what order should I tighten the pan bolts?
Tighten the pan bolts in a crisscross or star pattern. This ensures even pressure distribution across the gasket, promoting a better seal.
How often should I check the torque on the transmission pan bolts?
It’s a good practice to check the torque after the first few drives following maintenance or replacement. Afterward, periodic checks during regular maintenance intervals can ensure no bolts have loosened over time.
If I notice a transmission fluid leak after installation, what could be the possible reasons?
Potential causes can include: under-torquing or over-torquing of bolts, a damaged or improperly seated gasket, or a deformed transmission pan. Always check the torque specs first, and ensure the gasket is aligned correctly.
Can I use a standard torque wrench for the 4L80E transmission pan bolts?
Yes, as long as the torque wrench is calibrated and capable of measuring in the required torque range (18 ft-lbs or 24 N·m).
What type of transmission fluid should I use after replacing the pan or gasket?
Always refer to the manufacturer’s recommendations for the appropriate type and grade of transmission fluid for the 4L80E.
Conclusion
The 4L80E transmission pan torque specifications play a pivotal role in ensuring optimal performance and preventing fluid leaks. Adhering to the recommended torque values safeguards the transmission’s integrity and longevity.
As with any automotive maintenance or repair, meticulous attention to detail, adherence to manufacturer recommendations, and the use of calibrated tools are paramount. When questions arise, always consult the vehicle’s service manual or seek advice from seasoned professionals.
The key takeaway is that proper torque application is not merely a procedural step, but a critical component of vehicle health and safety.
See Also:
- Transmission Oil Pan Torque Specs
- 6L80E Transmission Pan Torque Specs
- Dodge Transmission Pan Torque Specs