
How to Read a Tire Pressure Gauge and Inflate Your Tires Correctly

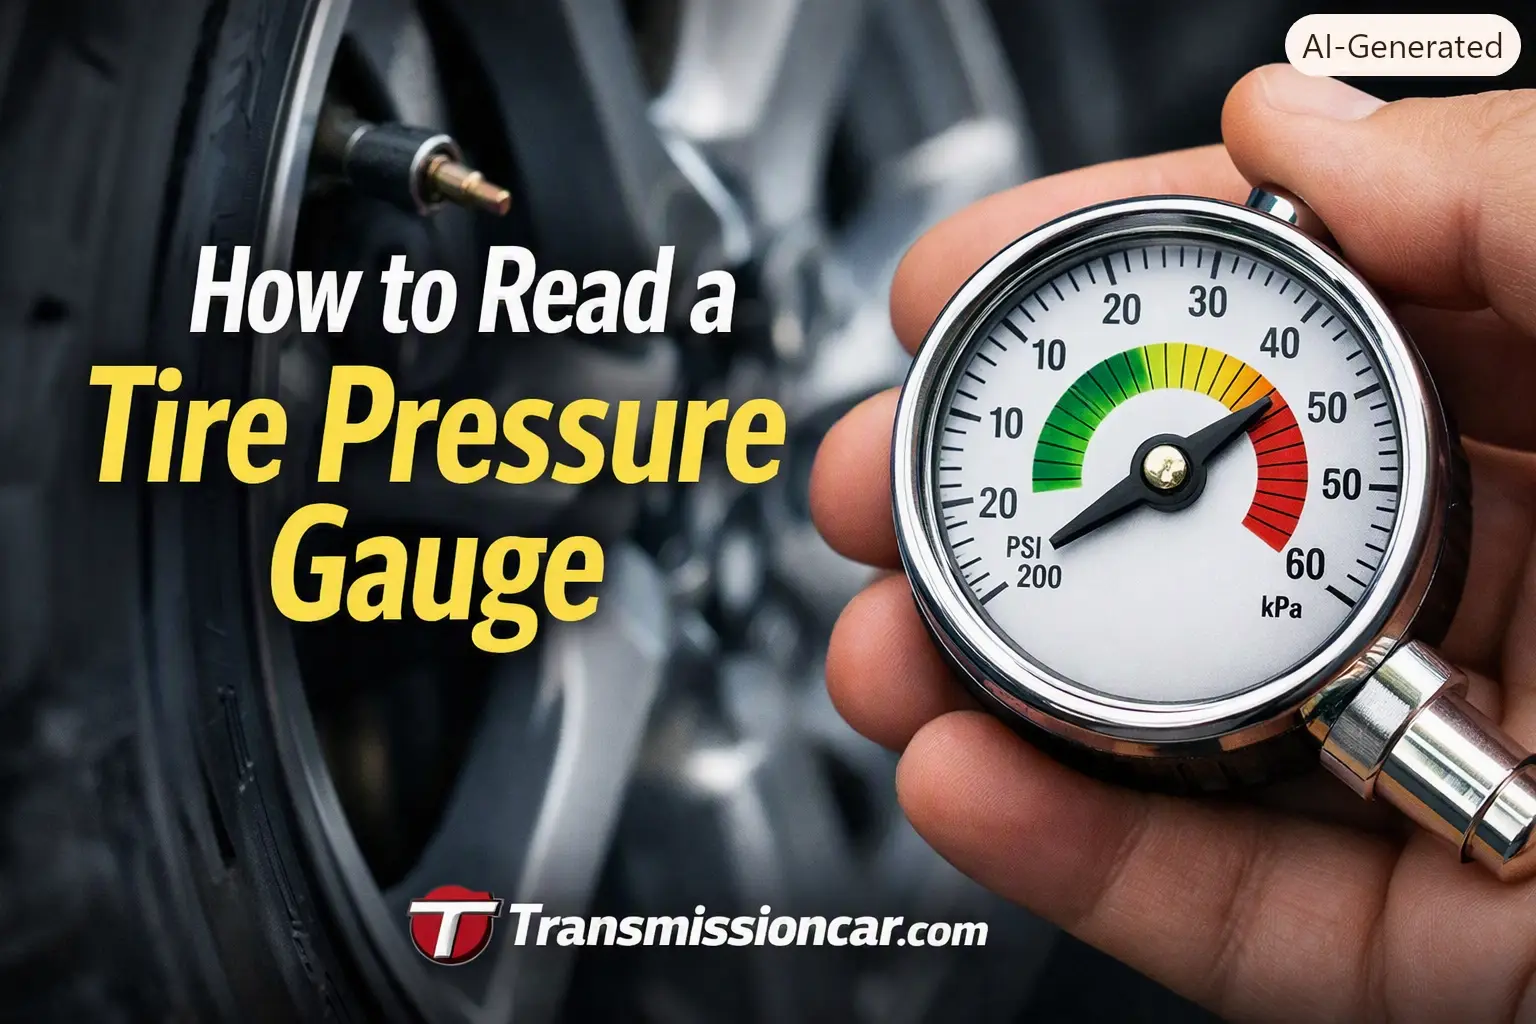
A tire pressure gauge may look simple, but an incorrect reading can lead to underinflated or overinflated tires. Both conditions can affect handling, braking, fuel use, ride quality, and tire life.
Learning how to read a tire pressure gauge helps you determine whether your tires need more air, less air, or no adjustment. This guide explains the main gauge types, where to find the correct pressure, how to use a tire inflator safely, and when a tire problem requires professional inspection.
Quick Answer
To read a tire pressure gauge, remove the tire’s valve cap, press the gauge firmly onto the valve stem, and note the PSI reading. Compare it with the recommended cold-tire pressure on the driver-side door-jamb label. Add or release air as needed, then check the pressure again.
What Does a Tire Pressure Gauge Measure?
A tire pressure gauge measures the air pressure inside a tire. In the United States, the reading is normally displayed in PSI, which stands for pounds per square inch.
For example, a gauge reading of 33 PSI means the air inside the tire is applying 33 pounds of pressure per square inch.
Most passenger vehicles have recommended pressures somewhere around 30–36 PSI, but this is only a general range. Trucks, SUVs, performance cars, electric vehicles, and vehicles carrying heavy loads may require different pressures.
Always use the pressure specified by the vehicle manufacturer.
Where to Find the Correct Tire Pressure
Before checking your tires, locate the manufacturer’s recommended cold-tire pressure. It is usually printed on a label in one of these locations:
- Inside the driver-side door jamb
- On the edge of the driver’s door
- Inside the glove compartment
- Inside the fuel door on some vehicles
- In the vehicle owner’s manual
The label may list different pressures for the front and rear tires. For example:
- Front tires: 35 PSI
- Rear tires: 33 PSI
- Spare tire: 60 PSI
Follow each listed value rather than assuming all tires require the same pressure.
According to the NHTSA tire safety guidance, drivers should check all tires, including the spare, at least once a month when the tires are cold. (NHTSA)
Do Not Use the Maximum PSI on the Tire Sidewall
The number molded into the tire sidewall is normally the tire’s maximum cold inflation pressure, not the recommended operating pressure for your vehicle.
For example, the sidewall may say “Maximum Pressure 51 PSI,” while the door-jamb label recommends only 35 PSI.
Inflating the tire to 51 PSI could produce:
- A harder and less comfortable ride
- Reduced traction on some road surfaces
- Faster wear in the center of the tread
- Greater sensitivity to pothole damage
- Changes in braking and handling
Use the door-jamb pressure unless the vehicle manufacturer provides different instructions for a specific load or driving condition.
Types of Tire Pressure Gauges
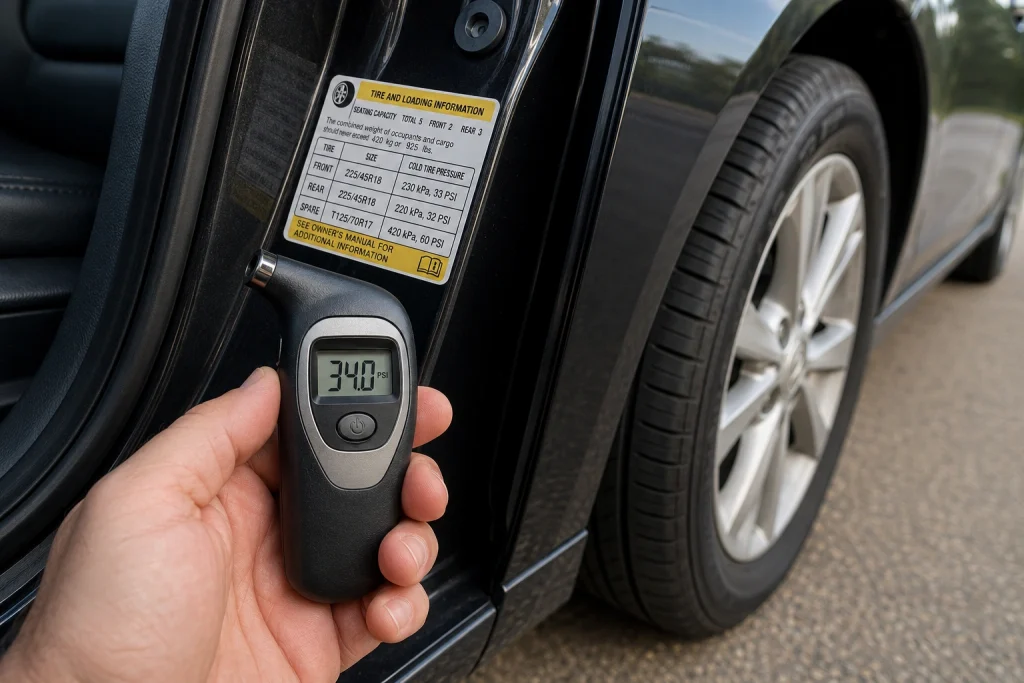
Tire pressure gauges generally come in three styles. All three can provide useful readings when they are in good condition and used correctly.
| Gauge type | How to read it | Main advantage | Possible limitation |
|---|---|---|---|
| Pencil or stick gauge | Read the number where the measuring stick stops | Affordable, compact, no battery | Small markings can be difficult to read |
| Dial gauge | Read the number indicated by the needle | Clear display and reusable design | Can lose accuracy if dropped or damaged |
| Digital gauge | Read the number shown on the screen | Fast and easy to read | Requires a working battery |
Pencil Gauge
A pencil gauge has a narrow body with a measuring stick inside it. When the gauge is pressed onto the valve stem, tire pressure pushes the stick outward.
To read it:
- Find the edge of the gauge body where the stick exits.
- Look at the number aligned with that edge.
- Check whether the scale is marked in PSI, kPa, bar, or multiple units.
If the stick stops halfway between 32 and 34 PSI, the reading is approximately 33 PSI.
Push the measuring stick completely back into the gauge before checking another tire.
Dial Gauge
A dial gauge has a round face and a moving needle. Press the gauge onto the valve stem and allow the needle to settle.
If the needle points directly at 35, the tire contains approximately 35 PSI.
Some dial gauges hold the reading after they are removed from the valve. Press the reset or release button before taking another measurement.
Digital Gauge
A digital gauge displays the pressure on an electronic screen. Turn it on, select PSI if necessary, and press it firmly onto the valve stem.
The display may show a reading such as:
- 32.0 PSI
- 34.5 PSI
- 238 kPa
Digital gauges are often easiest for beginners because there is no needle or measuring stick to interpret.
However, a weak battery can produce a dim screen, inconsistent readings, or no reading at all. Keep a spare battery or a basic pencil gauge in your emergency kit.
How to Read a Tire Pressure Gauge Step by Step
For the most useful reading, check the tires before driving or after the vehicle has been parked for at least three hours. Driving heats the tires and temporarily increases their pressure.
1. Park on a Safe, Level Surface
Park away from traffic and apply the parking brake. Avoid checking tire pressure on a narrow shoulder unless the vehicle cannot be moved safely.
Turn on the hazard lights if you are working near a roadway.
2. Find the Recommended PSI
Read the tire information label inside the driver-side door area. Write down the correct front and rear pressures if they are different.
3. Remove the Valve Cap
Unscrew the small cap from the tire’s valve stem. Put it in your pocket or another safe place so it does not roll away.
Inspect the valve for:
- Cracks
- Bending
- Corrosion
- Dirt or debris
- Signs of air leakage
4. Press the Gauge Straight Onto the Valve
Place the gauge firmly and squarely over the valve stem.
You may hear a very brief hiss as the gauge makes contact. The hissing should stop once the gauge is properly seated.
Continuous hissing usually means the gauge is not aligned correctly. Remove it and try again.
5. Read the Gauge
Read the displayed PSI according to the gauge type:
- Pencil gauge: read the extended measuring stick.
- Dial gauge: read the needle position.
- Digital gauge: read the screen.
Take a second reading if the first result seems unusual.
6. Compare the Reading With the Recommended PSI
Suppose the vehicle label recommends 35 PSI.
- A reading of 35 PSI normally requires no adjustment.
- A reading of 31 PSI means the tire needs approximately 4 PSI.
- A reading of 39 PSI means the tire may need approximately 4 PSI released.
Small differences of about 1 PSI can result from gauge accuracy and temperature. Large or repeated differences require attention.
7. Replace the Valve Cap
After making any adjustment, reinstall the valve cap. It helps keep water, road salt, and dirt out of the valve mechanism.
Repeat the process on every tire, including the spare when accessible.
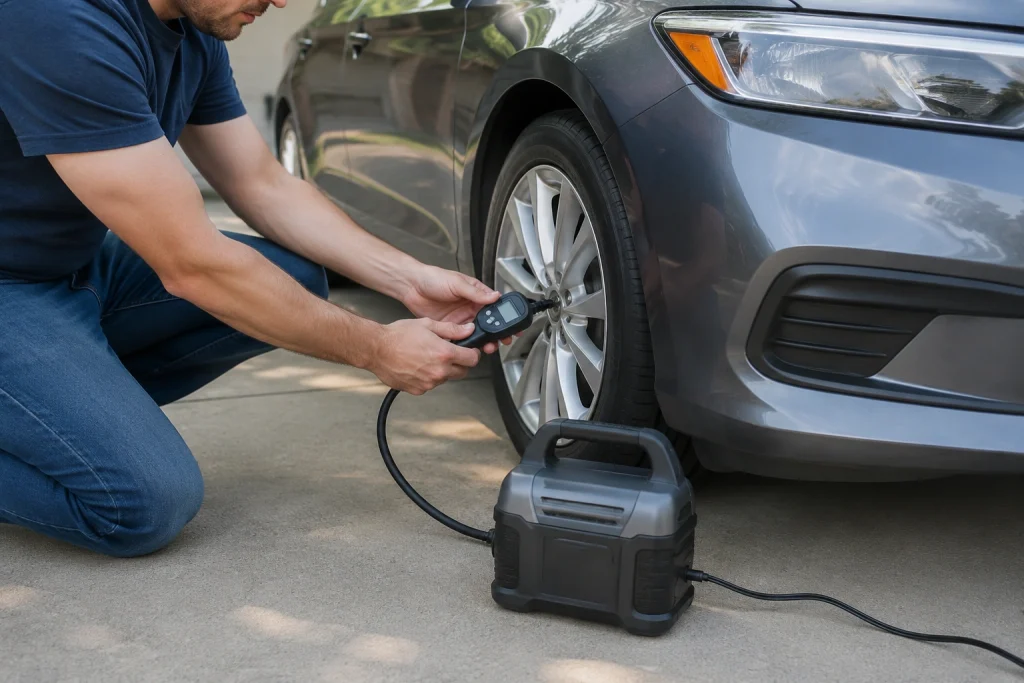
How to Use a Tire Inflator After Checking Pressure
A tire inflator adds compressed air to the tire. Depending on the model, it may connect to:
- A vehicle’s 12-volt outlet
- A rechargeable battery
- The vehicle battery with clamps
- A household electrical outlet
- A shop air compressor
Read the inflator instructions before use because operating limits and connection procedures vary.
Inflating a Low Tire
- Position the inflator on stable ground.
- Connect its power source as instructed.
- Attach the air hose securely to the valve stem.
- Set the target pressure if the inflator has an automatic shutoff.
- Add air in short intervals.
- Stop and check the pressure with your separate gauge.
- Continue until the tire reaches the recommended cold PSI.
- Disconnect the hose and reinstall the valve cap.
Some inflators display pressure while running, but vibration and airflow can make the display fluctuate. For a more stable reading, stop the compressor before checking.
The Bridgestone tire-pressure checking instructions also recommend pressing the gauge firmly enough to stop the hissing and repeating the process on all four tires. (Bridgestone Tires)
Releasing Excess Air
If the pressure is too high, press the small center pin inside the valve stem with the gauge’s bleed button or another suitable tool.
Release air in short bursts. Check the pressure after each burst.
Do not release air from a hot tire simply because the reading is above the cold specification. The pressure will normally decrease as the tire cools.
Expert Tip: Keep one reliable gauge in your glove compartment and use the same gauge for routine checks. This makes it easier to notice real pressure changes instead of differences between several gauges.
What Tire Pressure Readings Mean
The following example assumes the vehicle manufacturer recommends 35 PSI.
| Gauge reading | Likely condition | Recommended action |
|---|---|---|
| 35 PSI | Correct cold pressure | No adjustment needed |
| 33–34 PSI | Slightly low | Add a small amount of air and recheck |
| 29–32 PSI | Noticeably low | Inflate and inspect for continued air loss |
| Below 29 PSI | Significantly low | Inflate before normal driving and inspect for damage |
| 36–37 PSI | Slightly above target | Recheck when completely cold |
| 38 PSI or higher | Overinflated or measured hot | Let the tire cool before adjusting |
| Pressure drops again quickly | Possible leak | Arrange professional tire inspection |
These numbers are examples rather than universal limits. Base your decision on the pressure listed for your vehicle.
Why Correct Tire Pressure Matters
Better Vehicle Control
Tire pressure affects the size and shape of the tire’s contact area with the road.
An underinflated tire may feel soft, slow, or unstable. An overinflated tire may feel unusually stiff and may have less ability to absorb road impacts.
Correct pressure supports predictable:
- Steering response
- Braking
- Cornering
- Highway stability
- Emergency handling
Longer Tire Life
Underinflation commonly increases wear along the outer shoulders of the tread. Overinflation can increase wear near the center.
Uneven wear reduces tire life and may hide other problems such as poor alignment, damaged suspension parts, or incorrect wheel balance.
Improved Fuel Economy
Low pressure increases rolling resistance, meaning the engine must use more energy to keep the vehicle moving.
The U.S. Department of Energy fuel-economy guidance explains that maintaining proper tire inflation can improve efficiency while supporting tire safety and durability. (Fuel Economy)
Reduced Strain and Misdiagnosis
Low tires can make a vehicle feel sluggish during acceleration. They can also create vibration, pulling, increased road noise, or changes in engine speed under load.
These symptoms may sometimes be mistaken for a transmission or driveline problem. Checking tire pressure is therefore a sensible first step before assuming that delayed acceleration or unusual road behavior requires expensive transmission repair.
However, tire pressure will not explain symptoms such as slipping gears, delayed engagement, transmission-fluid leaks, or harsh gear changes.
Should You Trust the TPMS Warning Light?
The Tire Pressure Monitoring System, or TPMS, is an important warning system, but it is not a replacement for a pressure gauge.
A TPMS warning may not appear until a tire is substantially below the recommended pressure. Federal TPMS requirements generally call for a warning when one or more tires reach approximately 25% below the vehicle manufacturer’s recommended cold pressure. (NHTSA)
For a tire recommended at 36 PSI, a 25% reduction would be approximately 27 PSI. That is already much lower than the normal target.
Check the tires manually when:
- The warning light appears
- The temperature changes sharply
- The vehicle pulls to one side
- A tire looks low
- You are preparing for a long trip
- You have recently repaired or rotated the tires
- The vehicle has been parked for an extended period
A flashing TPMS light often indicates a system or sensor fault rather than low pressure alone.
How Temperature Affects the Gauge Reading
Air pressure changes as temperature changes. Cold weather normally lowers the reading, while warm weather and driving increase it.
This is why the recommended pressure is described as cold tire pressure.
Check the tires:
- Before driving in the morning
- After the car has been parked for at least three hours
- Before a long trip rather than immediately after it
- When the vehicle is parked in shade, when practical
Do not inflate a warm tire only to the cold specification and then release air later without rechecking. Use the owner’s manual instructions if you must adjust pressure while the tires are warm.
How Accurate Should a Tire Pressure Gauge Be?
For routine vehicle maintenance, choose a gauge that provides consistent readings and is designed for your vehicle’s pressure range.
A passenger-car gauge with a range of 0–60 PSI is usually easier to read accurately than a 0–150 PSI heavy-truck gauge. Larger-scale gauges are useful for trucks, trailers, and high-pressure spare tires.
Look for:
- A clear PSI scale
- A durable valve connector
- A bleed valve for releasing air
- A protective rubber cover on dial gauges
- Replaceable batteries in digital models
- A suitable pressure range
- Consistent readings across repeated tests
Compare the gauge periodically with a trusted shop gauge. Replace it if readings become inconsistent or if the gauge has been dropped, crushed, exposed to water, or physically damaged.
Common Mistakes Vehicle Owners Should Avoid
- Using the sidewall maximum pressure: Follow the vehicle’s pressure label instead.
- Checking immediately after driving: Warm tires usually produce higher readings.
- Ignoring different front and rear pressures: Some vehicles specify separate values.
- Waiting for the TPMS light: A tire may be low before the warning appears.
- Trusting the inflator display without verification: Confirm the final pressure with a separate gauge.
- Adding too much air at once: Inflate in short intervals and recheck.
- Allowing continuous hissing: Reposition the gauge to prevent unnecessary air loss.
- Forgetting the spare tire: A flat spare cannot help during an emergency.
- Assuming repeated pressure loss is normal: Ongoing air loss can indicate a puncture, valve leak, rim problem, or tire damage.
- Using a damaged inflator hose or power cable: Replace damaged equipment before use.
When to Call a Transmission Professional
Most tire-pressure issues should be handled by a tire shop or general automotive service facility rather than a transmission specialist.
However, contact a transmission professional when the vehicle continues to show drivetrain symptoms after all tires have been correctly inflated and inspected. Relevant warning signs include:
- Engine speed rises without matching acceleration
- The transmission hesitates before engaging Drive or Reverse
- The vehicle shudders during gear changes
- Gear changes are unusually hard or delayed
- Transmission fluid appears under the vehicle
- A transmission warning message appears
- The vehicle enters reduced-power or limp mode
Start by recording when the symptom occurs, the vehicle speed, whether the engine is cold or warm, and any warning lights. This information can reduce diagnostic time.
When choosing a repair facility, consider technicians with relevant credentials and ask for a written diagnosis before approving major work. The ASE Blue Seal repair-shop locator can help vehicle owners identify facilities employing a high percentage of ASE-certified professionals. (ASE)
When a Tire Needs Professional Inspection
Stop relying on inflation alone and arrange an inspection if:
- A tire loses several PSI repeatedly
- You hear air leaking from the valve or tread
- A nail or screw is visible
- The sidewall has a cut, bubble, or bulge
- The wheel is bent or cracked
- The tire was driven while nearly flat
- The tread is separating
- The vehicle vibrates after inflation
- One tire remains much hotter than the others
Do not attempt to repair a sidewall puncture or bulge. These conditions often require tire replacement.
A tire that has been driven while severely underinflated may have hidden internal damage even when it holds air again.
FAQs
How do I know whether my tire pressure gauge is reading correctly?
Take two or three readings from the same cold tire. The results should be nearly identical. Compare the gauge with a trusted shop gauge if the numbers vary or seem unrealistic.
What does PSI mean on a tire pressure gauge?
PSI means pounds per square inch. It describes the amount of air pressure inside the tire.
Should I check tire pressure before or after driving?
Check it before driving or after the vehicle has been parked for at least three hours. This provides a cold-tire reading that can be compared directly with the door-jamb specification.
Is a digital tire pressure gauge better than a pencil gauge?
A digital gauge is easier to read, while a pencil gauge is inexpensive and does not need batteries. Either can work well when it is undamaged, accurate, and used properly.
Can I use the gauge built into my tire inflator?
Yes, but confirm the final pressure with a separate handheld gauge when possible. Built-in readings can fluctuate while the compressor is operating.
Why does my tire pressure keep dropping?
Possible causes include a puncture, leaking valve core, damaged valve stem, corroded wheel, poor tire-to-rim seal, or temperature change. Repeated loss from one tire usually requires inspection.
Can incorrect tire pressure feel like a transmission problem?
Low pressure can make a vehicle feel sluggish, unstable, or resistant to movement. However, it does not normally cause gear slipping, delayed engagement, transmission-fluid leaks, or harsh shifting.
Conclusion
Understanding how to read a tire pressure gauge is one of the simplest ways to protect your tires, improve vehicle control, and avoid unnecessary repair costs.
Check the tires when they are cold, compare each reading with the driver-side door-jamb label, and use your tire inflator in short intervals. Never use the maximum sidewall pressure as the normal target.
Make pressure checks part of your monthly vehicle-maintenance routine. When a tire repeatedly loses air or the vehicle still shows acceleration, shifting, or driveline problems after the tires are corrected, schedule a proper inspection before approving expensive repairs.
