
How to Set PSI on a Tire Inflator: A Simple Step-by-Step Guide

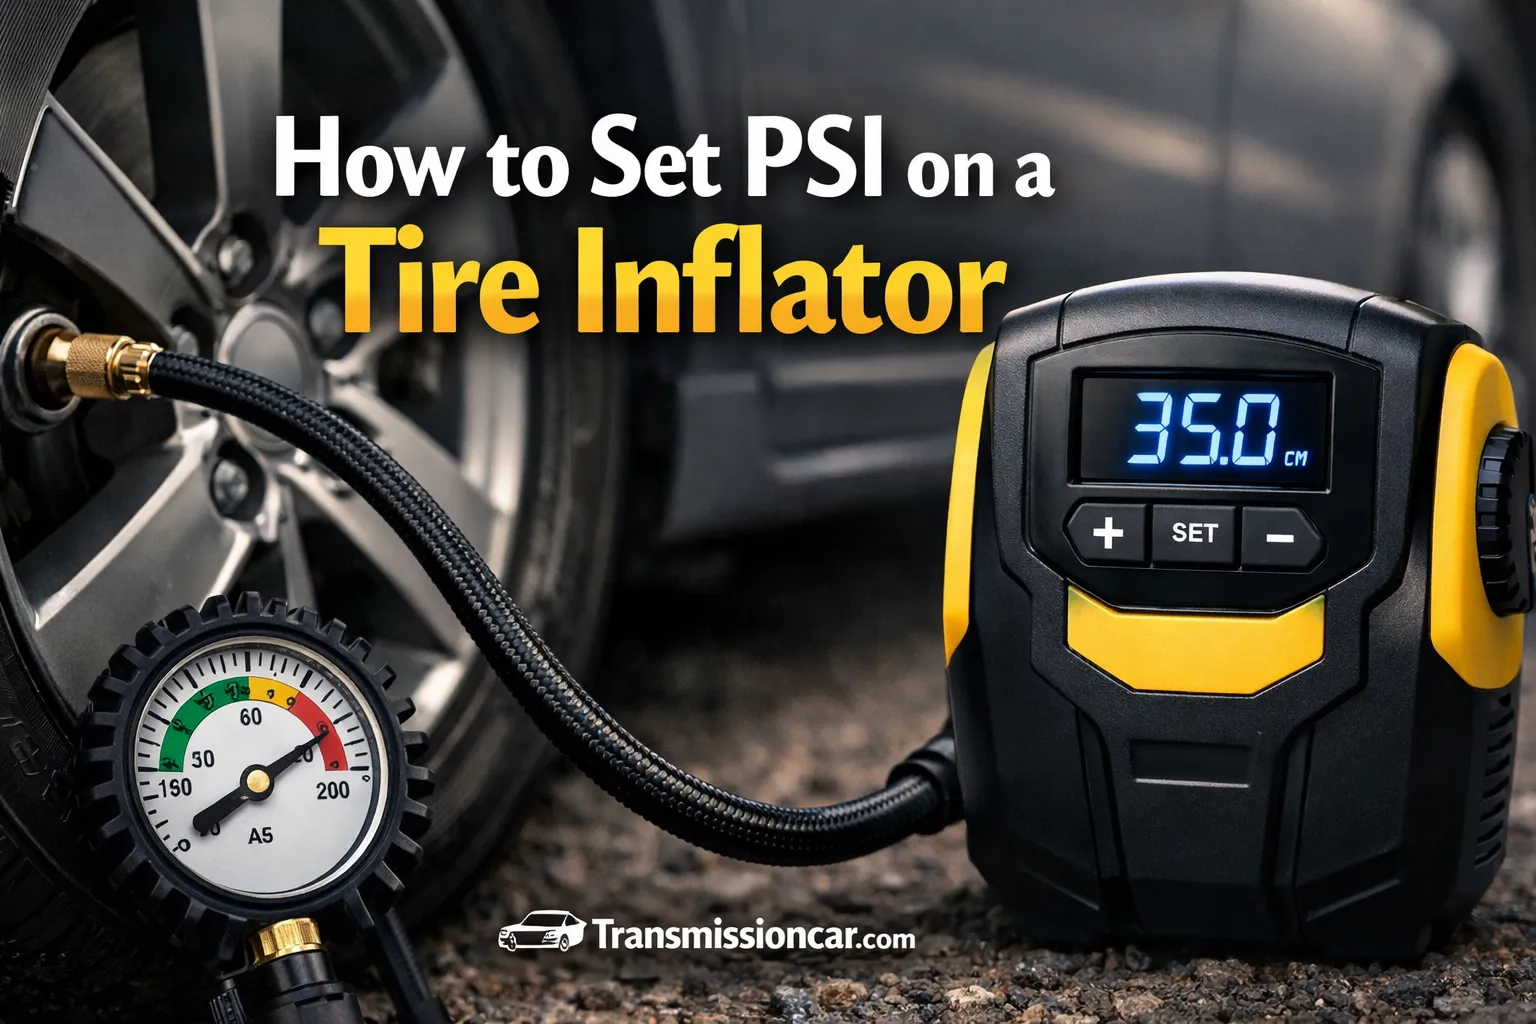
You know your tire needs air, but the controls on the inflator may not be obvious. Should you enter the number shown on the tire, use the number on the dashboard, or follow the label inside the driver’s door?
Learning how to set PSI on a tire inflator helps prevent underinflation, overinflation, uneven tire wear, poor handling, and unnecessary fuel use. The process is usually simple: find your vehicle’s recommended pressure, select the PSI unit, enter the target number, connect the hose, and start inflation.
This guide explains how to use digital, cordless, analog, and gas-station tire inflators safely. It also covers common mistakes, pressure accuracy, TPMS warnings, equipment quality, and situations that require professional inspection.
Quick Answer
To set PSI on a tire inflator, find the recommended cold-tire pressure on the driver’s door-jamb label. Turn on the inflator, select PSI as the measurement unit, use the plus or minus buttons to enter the target pressure, connect the hose securely, and start the machine. Most digital inflators stop automatically.
What Does PSI Mean on a Tire Inflator?
PSI means pounds per square inch. It measures the amount of air pressure inside a tire.
For example, if your door-jamb label says:
- Front tires: 35 PSI
- Rear tires: 33 PSI
You should set the inflator to 35 PSI for each front tire and 33 PSI for each rear tire.
The correct number is based on the vehicle manufacturer’s testing for vehicle weight, handling, braking, tire size, and load capacity. According to the NHTSA TireWise tire safety guidance, the recommended pressure is measured when the tires are cold. (NHTSA)
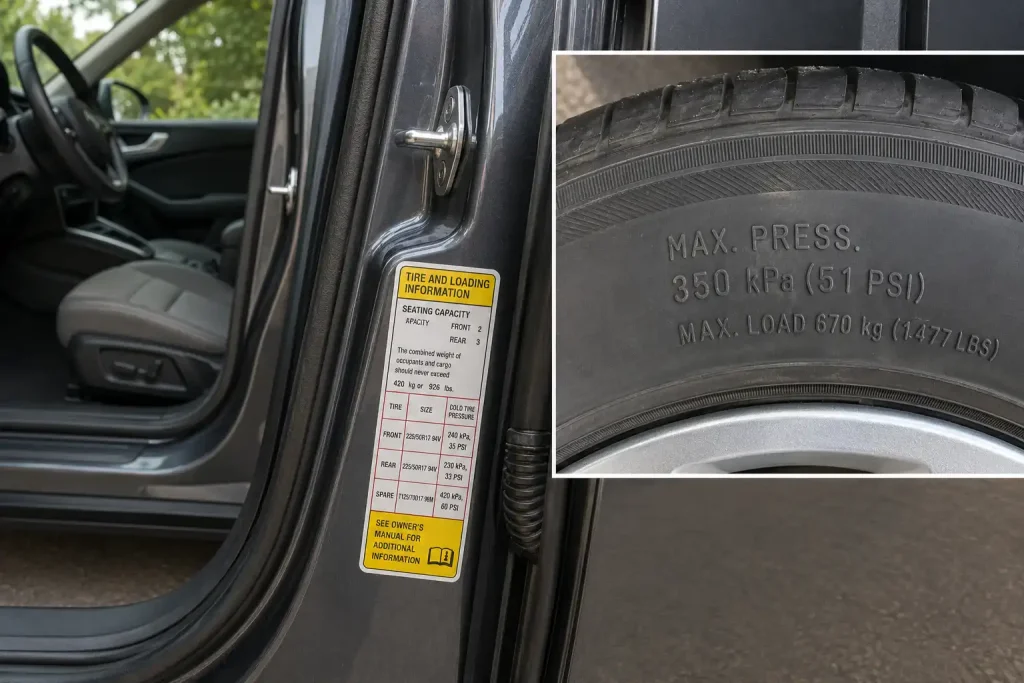
Do not automatically use the PSI number molded into the tire sidewall. That number normally represents the tire’s maximum permitted cold inflation pressure, not the ideal pressure for your specific vehicle.
Where to Find Your Vehicle’s Correct Tire Pressure
Before operating the inflator, confirm the correct pressure for the vehicle.
You can usually find it in one of these places:
- On a label inside the driver’s door jamb
- On the edge of the driver’s door
- Inside the glove compartment
- Inside the fuel-filler door on some vehicles
- In the owner’s manual
The label may list different pressures for:
- Front and rear tires
- Normal and heavily loaded driving
- Full-size and temporary spare tires
- Different factory-approved tire sizes
The NHTSA winter driving guidance also advises drivers to use the pressure on the vehicle label or in the owner’s manual rather than the maximum pressure printed on the tire. (NHTSA)
What If the Door Label Is Missing?
Check the owner’s manual or contact the vehicle manufacturer using the vehicle identification number, or VIN.
Do not guess based only on another vehicle with similar tires. Two vehicles using the same tire size may require different pressures because their weight, suspension, and load distribution are different.
How to Set PSI on a Digital Tire Inflator
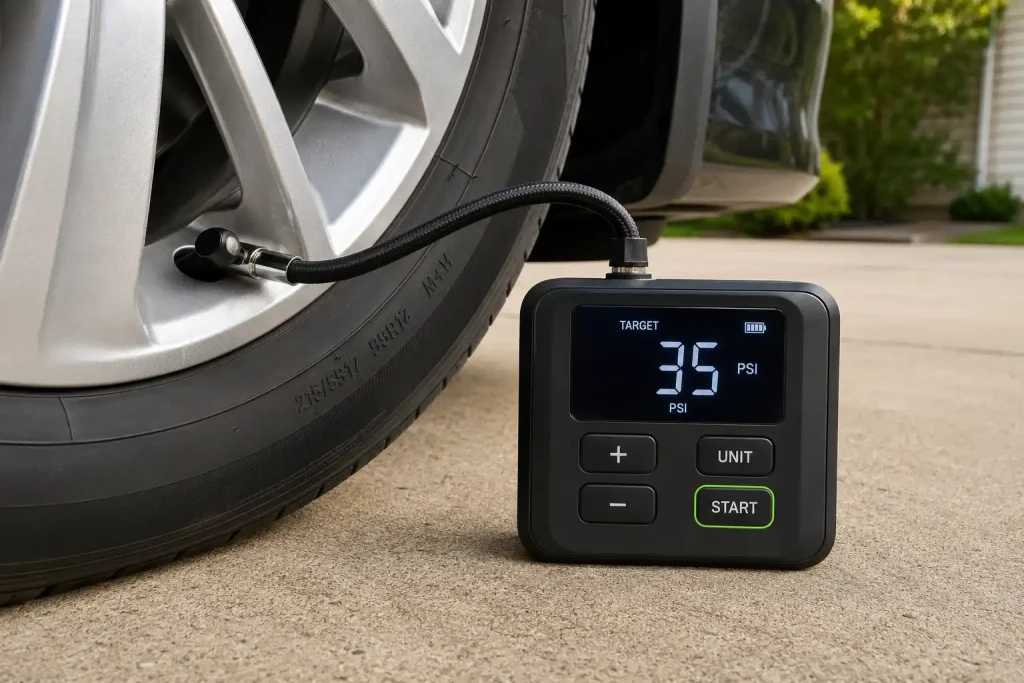
Digital preset inflators are among the easiest models to use. They allow you to enter a target pressure and usually stop automatically when that pressure is reached.
1. Park the Vehicle Safely
Park on a flat, stable surface away from moving traffic.
Apply the parking brake and place the transmission in Park. For a manual-transmission vehicle, select first gear or reverse and apply the parking brake.
Whenever possible, check the pressure before driving or after the vehicle has been parked for at least three hours. Driving heats the tires and temporarily raises the reading.
2. Find the Recommended Cold PSI
Read the tire-information placard inside the driver’s door.
Pay attention to whether the front and rear tires require different pressures. Do not assume all four tires use the same number.
3. Connect the Inflator to Its Power Source
Depending on the model, the inflator may use:
- A rechargeable battery
- A 12-volt accessory socket
- A standard household electrical outlet
- A vehicle battery connection
- A gasoline-powered or shop air compressor
If using the vehicle’s 12-volt socket, follow the inflator manufacturer’s instructions about whether the engine should be running. Keep the vehicle outdoors if the engine is operating because exhaust gases can build up in enclosed spaces.
4. Turn On the Inflator
Press the power button. The screen may initially display the tire’s current pressure after the hose is connected.
Some inflators briefly show all screen symbols during startup. Wait until the display settles before entering the target pressure.
5. Select PSI as the Unit
Many digital inflators can display:
- PSI
- BAR
- kPa
- kg/cm²
Press the unit or mode button until PSI appears.
This step matters. Setting the machine to 35 BAR instead of 35 PSI would be an extreme and unsafe error. Most consumer machines will not reach that pressure, but selecting the correct unit prevents confusion and equipment misuse.
6. Enter the Target Pressure
Use the plus and minus buttons to set the required PSI.
For a vehicle requiring 35 PSI:
- Press the plus button until the display reads 35.
- Pause for a moment to allow the setting to save.
- Confirm that the screen still shows PSI.
- Check whether the setting is for the front or rear tire.
On some models, a short press changes the number gradually, while holding the button changes it quickly.
7. Remove the Valve Cap
Unscrew the small cap from the tire valve stem. Put it in a pocket or another safe place so it does not get lost.
Inspect the valve stem briefly. A bent, cracked, corroded, or loose valve stem can leak and should be inspected by a tire professional.
8. Attach the Inflator Hose
Push or screw the hose connector onto the valve stem.
The connection should be straight and secure. A brief hiss is normal as the connector is installed, but continuous hissing means the connection is not sealed correctly.
Do not force the connector sideways. Valve stems and tire-pressure sensors can be damaged by rough handling.
9. Start Inflation
Press the start or trigger button.
The inflator may become louder and its pressure reading may fluctuate while air is moving through the hose. This is usually normal.
Most preset digital inflators stop automatically at the selected pressure. However, remain beside the equipment and monitor it. Automatic shutoff is a convenience feature, not permission to leave an inflator unattended.
10. Verify the Final Pressure
After the machine stops, wait several seconds and read the display again.
For better accuracy, check the tire with a separate quality pressure gauge. A reading that differs by one PSI may result from gauge calibration, hose pressure, temperature, or the small amount of air released when disconnecting the fitting.
11. Disconnect the Hose and Replace the Cap
Remove the connector promptly and reinstall the valve cap.
The cap does not hold the tire’s main air pressure, but it protects the valve from dirt, moisture, and road debris.
Repeat the process for the remaining tires, entering a different PSI for the rear tires when required.
Tire Inflator Setting Checklist
| Step | What to Do | Why It Matters |
|---|---|---|
| Find the pressure | Read the driver’s door-jamb label | Prevents using an incorrect target |
| Check tires cold | Inflate before driving when possible | Provides a more accurate baseline |
| Select the unit | Confirm the screen displays PSI | Prevents unit-conversion errors |
| Set the target | Use the plus and minus controls | Establishes the automatic shutoff point |
| Connect securely | Install the hose straight onto the valve | Reduces leaks and protects the valve |
| Monitor inflation | Stay near the machine | Helps prevent overheating or overinflation |
| Verify afterward | Use the display or a separate gauge | Confirms the final pressure |
| Replace the cap | Reinstall the valve cap | Keeps contamination out of the valve |
How to Use an Inflator Without a Preset Function
Not every tire inflator allows you to program a target PSI. Basic analog compressors may have only an on/off switch and a pressure gauge.
With this type of inflator:
- Find the correct pressure on the vehicle placard.
- Connect the air hose to the valve stem.
- Turn on the compressor.
- Watch the pressure gauge continuously.
- Stop the machine slightly before or at the target.
- Wait for the gauge needle to settle.
- Add or release air in small amounts.
- Confirm the result with a separate gauge.
Analog gauges can vibrate while the compressor is operating. For a clearer reading, switch off the compressor and allow the needle to stabilize.
Never walk away from a non-preset inflator. It will normally continue supplying air until you turn it off.
How to Set PSI on a Gas-Station Tire Inflator
Gas-station inflators vary. Some have digital controls, while others use an air hose with a built-in gauge.
For a digital gas-station machine:
- Find the recommended PSI before starting.
- Use the plus or minus controls to enter the target.
- Remove the tire’s valve cap.
- Attach the hose firmly.
- Wait for the machine to finish or signal that the target has been reached.
- Check the final pressure before moving to the next tire.
Gas-station equipment receives heavy use. Its hose, connector, or gauge may be worn or damaged. Carrying a small personal tire gauge gives you a second reading and may help you identify an inaccurate machine.
What If the Tire Is Already Above the Target PSI?
Some inflators display the pressure but cannot release air automatically.
If the tire is overinflated, use one of the following:
- The bleed button on the inflator hose
- The release valve on a pressure gauge
- A valve-core tool designed for controlled air release
- The small pin on the back of some pencil gauges
Release air in short bursts, then measure again.
Do not hold the valve open for an extended period. Pressure can fall faster than expected, especially in a small passenger-car tire.
Should You Lower the Pressure of a Warm Tire?
Normally, no. A tire that has been driven may show a higher pressure because its internal air has warmed.
Do not release air merely to bring a hot tire down to the cold specification. It may become underinflated after cooling. Recheck it when cold unless there is an immediate safety concern or the pressure is clearly excessive.
Understanding Tire Pressure Changes
Tire pressure naturally changes with temperature. Colder air usually causes the pressure to fall, while warmer air and normal driving cause it to rise.
This is why a TPMS warning may appear on a cold morning and disappear later in the day. The warning should still be investigated rather than ignored.
- At least monthly
- Before a long road trip
- When outdoor temperatures change significantly
- After the vehicle has been parked for an extended period
- When the TPMS warning appears
- When handling, ride quality, or fuel economy changes
Proper inflation also affects operating cost. The U.S. Department of Energy’s fuel-efficient driving guidance explains that properly inflated tires can support fuel economy, tire life, and vehicle safety. (Alternative Fuels Data Center)
Expert Tip: Set a monthly reminder to check all four tires and the spare when they are cold. A portable inflator is most useful when it is charged, accessible, and paired with a dependable pressure gauge.
Does TPMS Show the Correct PSI?
A tire-pressure monitoring system, or TPMS, is a warning system. It should not replace routine manual pressure checks.
Some vehicles display the pressure of each tire. Others show only a warning symbol when one or more tires are significantly underinflated.
The dashboard reading may also update slowly after inflation. You may need to drive for several minutes before the system recognizes the new pressure.
If the TPMS warning remains on after all tires are properly inflated, possible causes include:
- A slow puncture
- A leaking valve stem
- A damaged wheel
- A failing TPMS sensor
- An incorrectly relearned sensor position
- A pressure difference caused by temperature
- An underinflated spare on vehicles that monitor it
A flashing TPMS light usually points to a system fault rather than ordinary low pressure. A tire shop can scan the sensors and identify the affected wheel.
Choosing a Reliable Tire Inflator
The lowest-cost inflator may be suitable for occasional emergencies, but durability and gauge accuracy can vary.
Consider these features before buying:
- Automatic shutoff: Stops inflation near the preset target.
- Clear digital display: Easier to read at night or in poor weather.
- Long power cord and hose: Helps reach all four tires.
- Duty-cycle rating: Indicates how long the compressor can run before cooling.
- Thermal protection: Helps protect the motor from overheating.
- Replaceable battery: Useful for long-term ownership.
- Built-in light: Helpful during roadside use.
- Bleed valve: Makes small pressure corrections easier.
- Storage case: Protects the hose, fittings, and power cable.
- Suitable maximum pressure: Important for truck, trailer, and high-pressure spare tires.
A compact inflator designed for passenger cars may take too long to fill large truck or RV tires. Match the machine’s airflow capacity and duty cycle to the vehicle.
For most owners, consistent accuracy and dependable construction matter more than a very high advertised maximum PSI.
Safety Warnings Before Inflating a Tire
Do not attempt normal inflation if the tire has:
- A large sidewall cut
- Exposed cords or internal structure
- A visible bulge
- Severe cracking
- Smoke, burning odor, or unusual heat
- A bead separated from the wheel
- Damage caused by driving while completely flat
- A wheel that is bent or visibly cracked
Adding pressure to a seriously damaged tire can cause sudden failure. Keep your face and body away from the sidewall while inflating, especially if the tire has recently been driven underinflated.
Also allow the compressor to cool according to its duty-cycle instructions. Small portable compressors can become extremely hot during extended use. Avoid touching the metal cylinder, hose fitting, or motor housing immediately after operation.
Common Mistakes Vehicle Owners Should Avoid
- Using the sidewall maximum as the target. Follow the vehicle’s pressure placard instead.
- Setting the wrong measurement unit. Confirm that the display shows PSI rather than BAR or kPa.
- Assuming front and rear pressures are identical. Check both values on the placard.
- Checking immediately after highway driving. Warm tires normally show higher pressure.
- Ignoring continuous hissing. It usually means the hose connector is not seated correctly.
- Leaving the inflator unattended. Automatic controls can malfunction or read inaccurately.
- Running the compressor beyond its duty cycle. This can overheat and shorten its life.
- Trusting only the TPMS warning. A tire can be below its ideal pressure before the warning appears.
- Forgetting the spare tire. Temporary spares often require a much higher pressure than road tires.
- Repeatedly adding air to the same tire. Frequent pressure loss usually indicates a leak that needs inspection.
- Using tire sealant as a permanent repair. Sealant may provide temporary mobility but does not replace an approved tire repair.
- Ignoring vibration after inflation. Pressure correction cannot fix tire separation, wheel damage, or balance problems.
When to Call a Transmission Professional
Incorrect tire pressure does not normally cause an internal transmission problem. However, tire and driveline symptoms can sometimes feel similar from the driver’s seat.
Begin with a tire or general repair shop when you notice:
- Steering-wheel vibration
- A thumping sound that changes with road speed
- Uneven tire wear
- A recurring low-pressure warning
- A tire that loses several PSI repeatedly
- Pulling to one side
- A damaged valve stem or wheel
Consult a transmission professional when the symptom remains after the tires, wheels, and alignment have been checked and you also notice:
- Engine speed rising without normal acceleration
- Delayed engagement into Drive or Reverse
- Harsh or slipping gear changes
- Transmission-fluid leakage
- Shuddering during a specific shift
- Warning codes related to the transmission
- Noise that changes with gear selection rather than road speed
A qualified shop should test-drive the vehicle and separate tire-speed vibration from transmission, axle, wheel-bearing, or driveshaft problems before recommending expensive repairs.
Do not approve a transmission replacement based only on a general vibration complaint. Ask for scan results, fluid-condition findings, diagnostic codes, and evidence showing that tire and driveline causes were ruled out.
FAQs
How do I set my tire inflator to 35 PSI?
Turn on the inflator, select PSI as the measurement unit, and use the plus or minus buttons until the target display reads 35. Connect the hose securely to the tire valve and press start. A preset digital inflator should stop automatically near 35 PSI.
What PSI should I enter into my tire inflator?
Use the cold-tire pressure printed on the vehicle-information label inside the driver’s door jamb. Do not use the maximum PSI printed on the tire sidewall unless the vehicle manufacturer specifically requires it.
Why does my inflator show a different PSI from my tire gauge?
Small differences can result from gauge calibration, air remaining in the hose, temperature, or air lost while disconnecting the fitting. Compare both devices when the tire is cold. Replace or recalibrate a gauge that differs consistently by several PSI.
Can I set all four tires to the same PSI?
Only when the vehicle placard specifies the same pressure for all four positions. Some vehicles require different front and rear pressures because of weight distribution, handling, or load requirements.
Will a tire inflator stop automatically?
A digital preset inflator normally stops when it reaches the selected pressure. Basic analog models may continue running until switched off. Always remain near the inflator and monitor the pressure, even when automatic shutoff is available.
Can I inflate a tire while the engine is running?
Some 12-volt inflators operate better with the engine running, but you should follow the manufacturer’s instructions. Run the engine only outdoors or in a properly ventilated area. Never idle a vehicle inside a closed garage.
Why does one tire keep losing pressure?
Common causes include a puncture, leaking valve core, damaged valve stem, corroded wheel, bead leak, or wheel damage. Repeatedly adding air is not a repair. Have the tire inspected if pressure loss continues.
Conclusion
Knowing how to set PSI on a tire inflator begins with using the correct pressure—not simply pressing buttons on the compressor. Find the cold-tire PSI on the driver’s door label, select PSI on the machine, enter the target, attach the hose securely, and monitor the inflation process.
Verify the final result with a reliable gauge, check all tires regularly, and investigate any tire that repeatedly loses air. Proper inflation supports predictable handling, longer tire life, safer driving, and more efficient vehicle operation.
Before your next trip, check the door-jamb label, inspect the tires for visible damage, and make sure your inflator is charged and ready. If a pressure warning, vibration, or leak continues, schedule a professional tire and driveline inspection before approving more expensive repairs.
