
How to Inflate Car Tires at Home Using a Tire Inflator

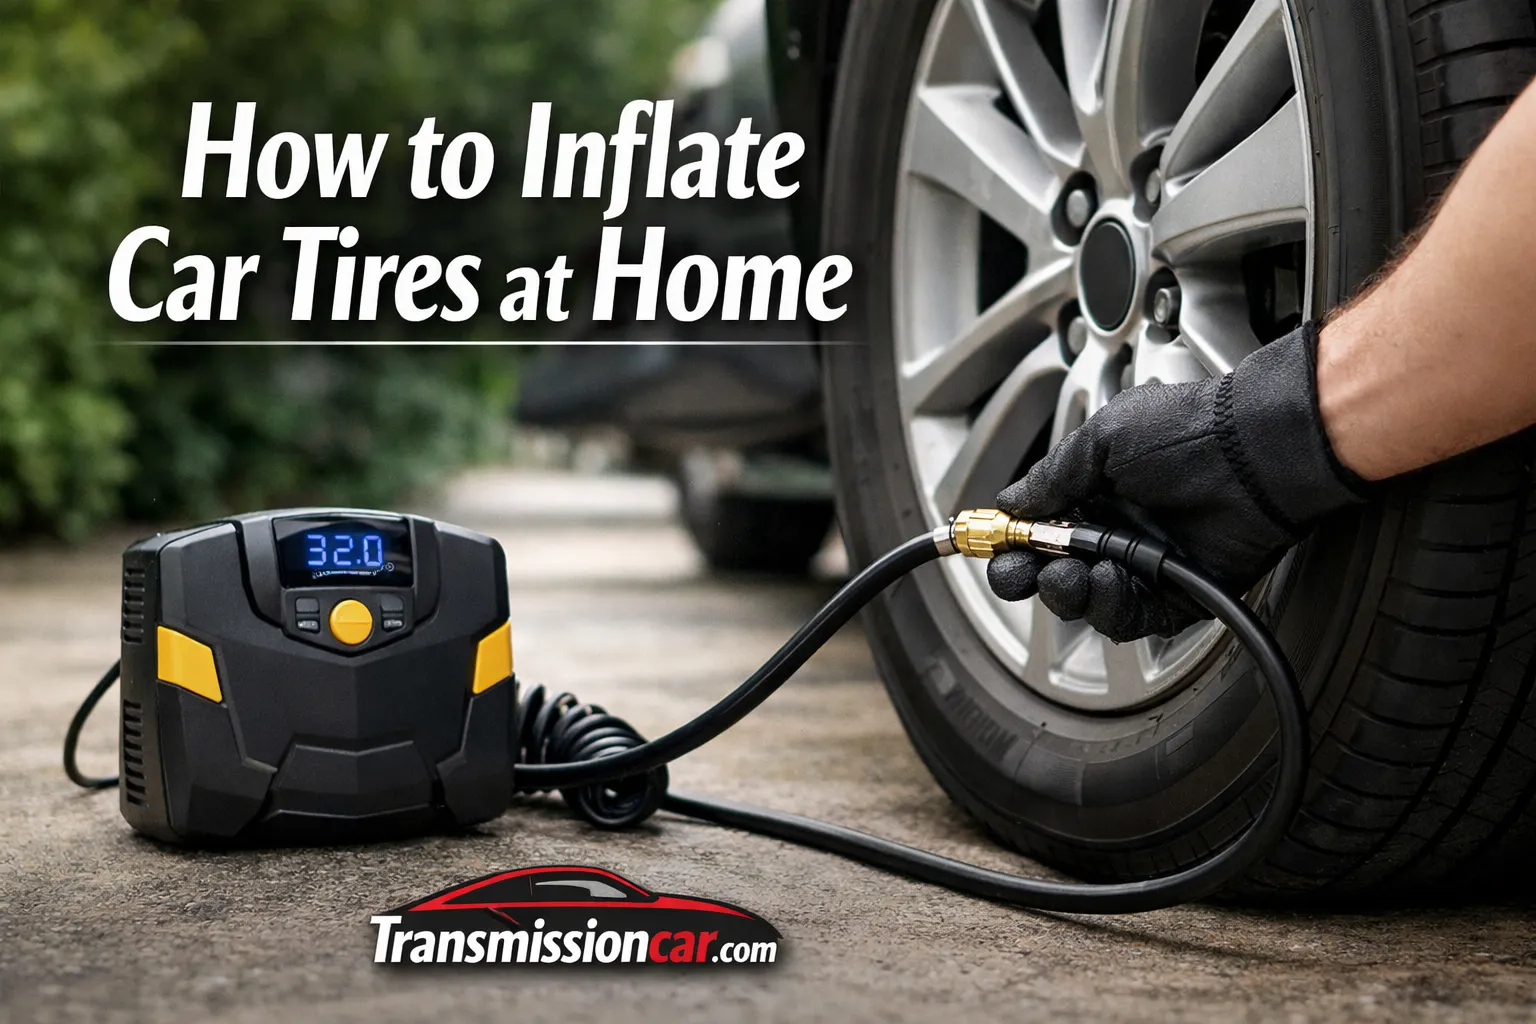
Low tire pressure can make your vehicle feel unstable, increase tire wear, reduce fuel economy, and eventually leave you stranded. Fortunately, learning how to inflate car tires at home is simple when you have a reliable tire inflator and know the correct pressure for your vehicle.
This guide explains how to find the right tire pressure, use a portable inflator safely, avoid overinflation, handle a TPMS warning, and recognize problems that require a tire shop or automotive professional.
Quick Answer
To inflate car tires at home, park on a level surface, find the recommended cold tire pressure on the driver-side door placard, check each tire with a gauge, and connect a tire inflator to the valve stem. Add air in short intervals until the tire reaches the recommended PSI, then recheck the pressure.
What Is a Tire Inflator?
A tire inflator is a small air compressor designed to add compressed air to vehicle tires. Most home and portable models receive power from one of four sources:
- A vehicle’s 12-volt accessory outlet
- A rechargeable battery
- A household electrical outlet
- A direct connection to the vehicle battery
Some inflators include a built-in digital pressure gauge and automatic shutoff. You select the desired pressure, start the inflator, and the machine stops when it reaches that setting.
A tire inflator is useful for routine pressure adjustments, seasonal temperature changes, and minor pressure loss. However, it cannot repair a puncture, damaged valve stem, cracked wheel, or internally damaged tire.
Why Correct Tire Pressure Matters
Tire pressure affects much more than ride comfort. It influences how the tire contacts the road, carries the vehicle’s weight, responds during braking, and handles corners.
Underinflated tires may cause:
- Slower steering response
- Increased heat buildup
- Uneven shoulder wear
- Reduced fuel efficiency
- Poorer handling
- Greater risk of tire damage
Overinflated tires may cause:
- A harsh ride
- Reduced road contact
- Faster center-tread wear
- Less traction on rough or wet surfaces
- Greater sensitivity to pothole impacts
The NHTSA TireWise safety guidance recommends checking all tires, including the spare when applicable, at least once a month while they are cold. It also explains that proper pressure affects safety, tire durability, and fuel consumption. (NHTSA)
Proper inflation may also reduce fuel use. The U.S. Department of Energy’s fuel-efficiency guidance reports that maintaining recommended tire pressure can improve gas mileage by about 0.6% on average and potentially as much as 3%. (Alternative Fuels Data Center)
Where to Find the Correct Tire Pressure
The correct tire pressure is determined by the vehicle manufacturer. It is usually listed in pounds per square inch, or PSI.
Look in these locations:
- The Tire and Loading Information label inside the driver-side doorjamb
- The edge of the driver’s door
- The vehicle owner’s manual
- The manufacturer’s official owner-information website
Many vehicles specify different pressures for the front and rear tires. Read the label carefully before inflating all four tires to the same number.
Do Not Use the Sidewall Number as Your Target
The pressure molded into the tire sidewall is normally the tire’s maximum pressure under specified load conditions. It is not automatically the recommended operating pressure for your vehicle.
For example, a tire sidewall may show a maximum pressure of 51 PSI while the vehicle placard recommends 35 PSI. In that case, the correct cold pressure is 35 PSI unless the vehicle manufacturer provides different instructions.
NHTSA specifically advises drivers not to inflate tires according to the sidewall maximum and to use the pressure listed on the vehicle label or in the owner’s manual instead. (NHTSA)
What You Need to Inflate Car Tires at Home
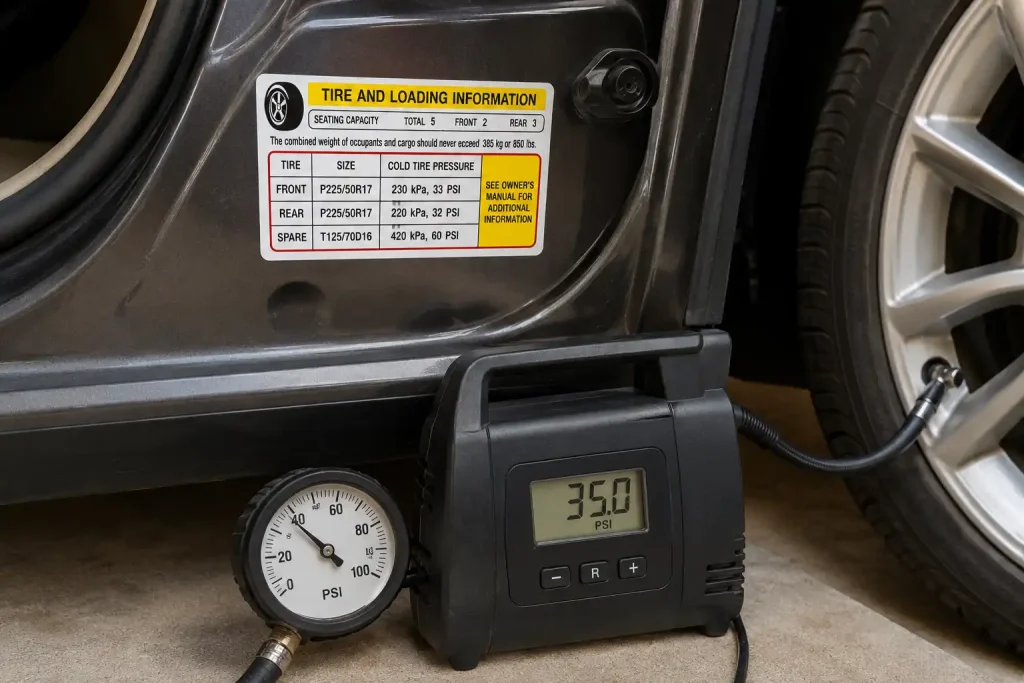
You only need a few basic items:
- A portable tire inflator or air compressor
- An accurate tire pressure gauge
- Your vehicle’s recommended PSI
- A power source for the inflator
- A flashlight if visibility is poor
- Gloves, if desired
Even when the inflator has a built-in gauge, keeping a separate handheld gauge is useful. It allows you to confirm the final pressure and check whether the inflator’s display is reasonably accurate.
Choosing a Tire Inflator
The best inflator is not always the most powerful model. Choose one that matches your vehicle and how you expect to use it.
| Inflator type | Best for | Advantages | Limitations |
|---|---|---|---|
| 12-volt plug-in | Cars and small SUVs | Affordable, compact, no charging required | Vehicle usually needs to remain nearby and may need to be running |
| Cordless rechargeable | Routine home use and emergencies | Portable and convenient | Battery may be discharged when needed |
| Household AC inflator | Garage use | Consistent power and easy operation | Not useful away from an electrical outlet |
| Dual-power inflator | Home and roadside use | Flexible power options | Usually larger and more expensive |
| Heavy-duty compressor | Trucks, trailers, and frequent use | Faster inflation and better durability | Heavier, louder, and less portable |
Consider the following quality features:
- A clear digital display
- Automatic shutoff
- A long power cord and air hose
- A stable base
- Thermal overload protection
- A work light
- Replaceable fuse protection
- Storage for cords and accessories
A small inflator may take several minutes to add significant pressure to a large SUV or truck tire. Check the manufacturer’s duty-cycle instructions because some compact compressors need cooling breaks.
How to Inflate Car Tires at Home: Step-by-Step
1. Park in a Safe Location
Park the vehicle on firm, level ground. Apply the parking brake and shift into Park. For a manual-transmission vehicle, select first gear or reverse according to the owner’s manual.
Avoid working beside moving traffic or on a soft shoulder. If a tire is completely flat and the wheel is supporting the vehicle’s weight, inspect it carefully before adding air.
2. Let the Tires Cool
Check and adjust pressure when the tires are cold. A practical cold-tire condition means the vehicle has been parked for at least three hours or has only been driven a very short distance.
Driving heats the tires and raises their internal pressure. Inflating a warm tire to the cold specification may leave it underinflated after it cools.
NHTSA advises checking tire pressure at least monthly when the vehicle has not been driven for three hours or more. (NHTSA)
3. Confirm the Recommended PSI
Read the driver-side placard and note the required pressure for:
- Front tires
- Rear tires
- Spare tire, when listed
Do not assume every tire needs the same pressure. Some vehicles use a higher rear pressure when carrying passengers or cargo.
4. Inspect the Tire Before Adding Air
Look for visible problems such as:
- A screw or nail in the tread
- Cuts or exposed cords
- Sidewall cracking
- A bubble or bulge
- A bent wheel
- A damaged valve stem
- Tread separating from the tire
- Severe or uneven wear
Do not continue inflating a tire with a sidewall bulge, exposed reinforcement material, major cut, or obvious structural damage. Install the spare if it is safe to do so or arrange roadside assistance.
5. Measure the Existing Pressure
Remove the valve cap and place the gauge firmly over the valve stem. A brief hiss is normal as you connect it, but the hissing should stop once the gauge seals properly.
Record the reading and compare it with the placard pressure.
Example:
- Recommended pressure: 35 PSI
- Current pressure: 30 PSI
- Air needed: approximately 5 PSI
Replace the valve cap temporarily if you need to prepare the inflator.
6. Connect the Tire Inflator
Connect the inflator to its power source before attaching it to the tire, unless its manufacturer specifies a different sequence.
For a 12-volt inflator:
- Plug it into the accessory outlet.
- Start the vehicle if the inflator instructions require it.
- Keep the vehicle outdoors or in a properly ventilated area.
- Route the cable away from hot, sharp, or moving components.
Never run a gasoline-powered vehicle inside a closed garage.
Attach the air hose securely to the valve stem. Threaded fittings should be snug but not overtightened. Lever-style fittings should lock firmly over the valve.
7. Add Air Gradually
Turn on the inflator and watch the pressure display. If the machine does not have automatic shutoff, stop periodically and measure the pressure with your separate gauge.
Avoid guessing based on how the tire looks. Modern radial tires can appear normal while significantly underinflated.
Small compressors become hot during use. Keep your hands away from the metal fitting and compressor body until they have cooled.
8. Stop at the Recommended Pressure
Stop when the tire reaches the cold PSI listed on the vehicle placard. Disconnect the inflator and check the pressure again with your gauge.
If the pressure is slightly high, press the small valve pin briefly to release air. Measure again after each short release.
A difference of several PSI should be corrected. Do not intentionally overinflate the tire because you expect it to lose air later.
9. Replace the Valve Cap
Install the valve cap securely. The cap helps protect the valve from dirt, moisture, and debris, although the internal valve core provides the primary air seal.
Repeat the process for every tire.
10. Recheck the Tires
After all tires are inflated:
- Compare the final readings
- Confirm that front and rear pressures match the placard
- Look for continued leaking
- Listen for hissing near the valve or tread
- Check the spare tire when accessible
If one tire was much lower than the others, inspect it again within a day or two. Repeated pressure loss indicates a leak.
Expert Tip
Expert Tip: Write the recommended front and rear PSI on a small card and keep it with your inflator. This prevents confusion when inflating tires in poor lighting, during cold weather, or away from home.
How Long Should a Tire Inflator Run?
Inflation time depends on:
- Tire size
- Starting pressure
- Compressor airflow
- Battery voltage
- Hose design
- Outside temperature
- Inflator condition
Adding two or three PSI may take less than a minute with a capable inflator. Raising a large tire from nearly flat can take much longer.
Read the inflator’s duty-cycle rating. A unit with a limited duty cycle may need to cool after several minutes of operation. Continuing beyond that limit can overheat the motor, damage the hose, or blow a fuse.
A portable inflator is designed to add air—not to run continuously without limits.
What to Do When the TPMS Light Comes On
The Tire Pressure Monitoring System, or TPMS, warns when one or more tires become significantly underinflated. It does not always show the exact pressure, and it should not replace monthly checks with a gauge.
When the light comes on:
- Reduce speed and avoid hard cornering.
- Stop in a safe place.
- Inspect all four tires.
- Measure each tire with a gauge.
- Inflate them to the vehicle placard pressure.
- Follow the owner’s manual if a TPMS reset is required.
If the symbol flashes for about a minute and then stays illuminated, the system may have a sensor or communication fault rather than a simple low-pressure condition. NHTSA recommends having the system inspected when this malfunction pattern appears. (NHTSA)
Can You Inflate a Completely Flat Tire?
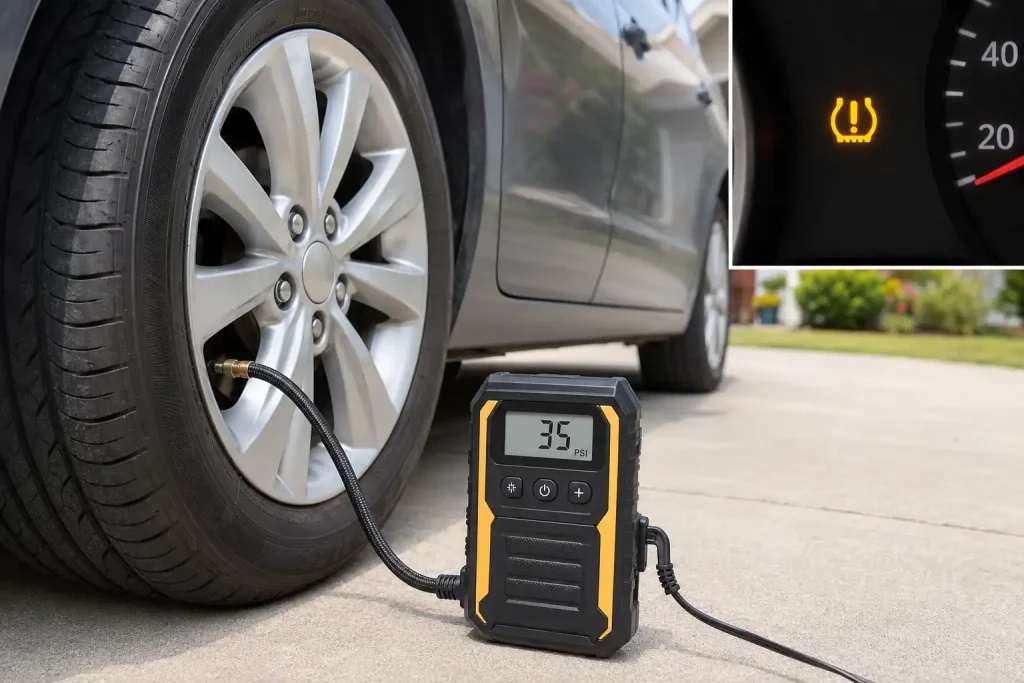
Sometimes, but only after determining why it is flat.
A tire that slowly lost air because of a small tread puncture may accept air long enough to move the vehicle to a nearby safe location. However, adding air does not make the tire safe or repair the puncture.
Do not attempt ordinary inflation when:
- The tire has separated from the wheel rim
- The sidewall is torn or crushed
- The tire has been driven while flat
- Internal cords are exposed
- The wheel is cracked or badly bent
- The tire inflates but immediately loses pressure
A punctured tire should be removed and inspected internally. The U.S. Tire Manufacturers Association’s tire-repair guidance explains that safe puncture repair requires industry-approved procedures rather than simply inserting an external plug and continuing to drive. (USTMA)
How Temperature Changes Tire Pressure
Tire pressure commonly falls during colder weather and rises as temperatures increase. This is why a TPMS light may appear on a cold morning and disappear after driving.
Do not ignore the warning just because it turns off later. Measure the tires while cold and adjust them to the placard specification.
Avoid lowering pressure from a warm tire simply because its reading is higher than the cold recommendation. The pressure normally increases during driving.
Common Mistakes Vehicle Owners Should Avoid
- Using the maximum sidewall pressure: Follow the vehicle placard instead.
- Checking only when the TPMS light appears: TPMS may not warn you about smaller pressure losses.
- Inflating warm tires to the cold specification: This can result in low pressure after cooling.
- Trusting appearance alone: A tire can be dangerously low without looking flat.
- Running the inflator too long: Follow its duty-cycle and cooling instructions.
- Ignoring repeated pressure loss: A tire that keeps losing air needs inspection.
- Inflating a visibly damaged tire: Bulges, exposed cords, and sidewall cuts require professional evaluation.
- Forgetting the spare: A flat spare is useless during an emergency.
- Using an inaccurate gauge: Compare your gauge periodically with another quality gauge.
- Leaving the engine running in a closed garage: Exhaust gases can accumulate quickly.
- Assuming air fixes a puncture: Inflation only restores pressure temporarily; it does not repair damage.
When to Call a Tire or Automotive Professional
Stop the DIY process and contact a qualified shop when:
- A tire repeatedly loses more than a small amount of pressure
- You find a nail, screw, cut, bubble, or exposed cord
- The valve stem leaks
- The wheel is bent or cracked
- The tire has been driven while flat
- The bead has separated from the rim
- The TPMS light flashes and stays on
- The vehicle pulls, shakes, or vibrates after pressure is corrected
- Tread wear is uneven
- You cannot identify the correct pressure
- The inflator cannot raise or hold pressure
Ask the shop to provide the measured pressures, identify the leak location, explain whether the tire is safely repairable, and show you any damage that requires replacement.
The ASE Blue Seal repair-shop locator can help vehicle owners find facilities employing a high proportion of ASE-certified technicians. (ASE)
When to Call a Transmission Professional
Inflating tires is not transmission work. However, low tire pressure can sometimes create noise, pulling, vibration, or sluggishness that a driver may mistakenly blame on the transmission.
Correct all tire pressures first. Then contact a transmission professional if the vehicle still shows transmission-specific symptoms, such as:
- Delayed engagement into Drive or Reverse
- Engine speed rising without matching acceleration
- Harsh or slipping gear changes
- Transmission-fluid leakage
- Repeated shuddering during shifts
- Grinding or whining that changes with gear selection
- A transmission warning light
- A burning smell accompanied by shifting problems
A tire inflator cannot correct driveline or transmission faults. Ask the shop to diagnose the symptom before approving a fluid service, repair, rebuild, or replacement.
FAQs
Can I inflate my car tires with a portable tire inflator?
Yes. A portable inflator is suitable for routine pressure adjustments when it is rated for your vehicle’s tire size. Follow the inflator instructions and stop at the cold pressure listed on the vehicle placard.
Should the car be running while using a tire inflator?
It depends on the inflator. Some 12-volt models recommend running the engine to prevent battery drain. Use the device according to its manual, and never run the engine inside a closed garage.
What PSI should I inflate my tires to?
Use the cold PSI printed on the Tire and Loading Information label inside the driver-side door area or in the owner’s manual. Do not use the tire sidewall maximum as your normal target.
Can I inflate warm tires?
You can add air when necessary, especially during an emergency, but the most accurate adjustment is made when the tires are cold. Recheck the pressure after the vehicle has been parked for several hours.
Why does my tire keep losing air after inflation?
Possible causes include a tread puncture, leaking valve core, damaged valve stem, wheel corrosion, bent rim, or bead leak. A shop should inspect a tire that repeatedly loses pressure.
Will the TPMS light turn off after adding air?
It often turns off after the tires are correctly inflated and the vehicle is driven briefly. Some vehicles require a reset procedure. If the light flashes before staying on, the TPMS itself may need service.
Is it safe to overinflate a tire slightly?
Intentional overinflation is not recommended. It can reduce ride comfort, alter road contact, and contribute to uneven wear. Set each cold tire to the manufacturer’s specified pressure.
Conclusion
Learning how to inflate car tires at home can save time, improve tire life, support better handling, and help prevent avoidable roadside problems. Start with cold tires, use the driver-side placard pressure, inspect for damage, and add air gradually with a suitable tire inflator.
Never treat inflation as a repair for a puncture or damaged tire. When a tire will not hold pressure, shows structural damage, or causes continued vibration, have it inspected before driving farther.
Keep a reliable inflator and pressure gauge in your vehicle, check all tires monthly, and correct small pressure problems before they become expensive safety issues.
